![]()
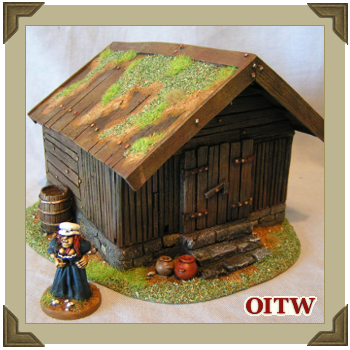
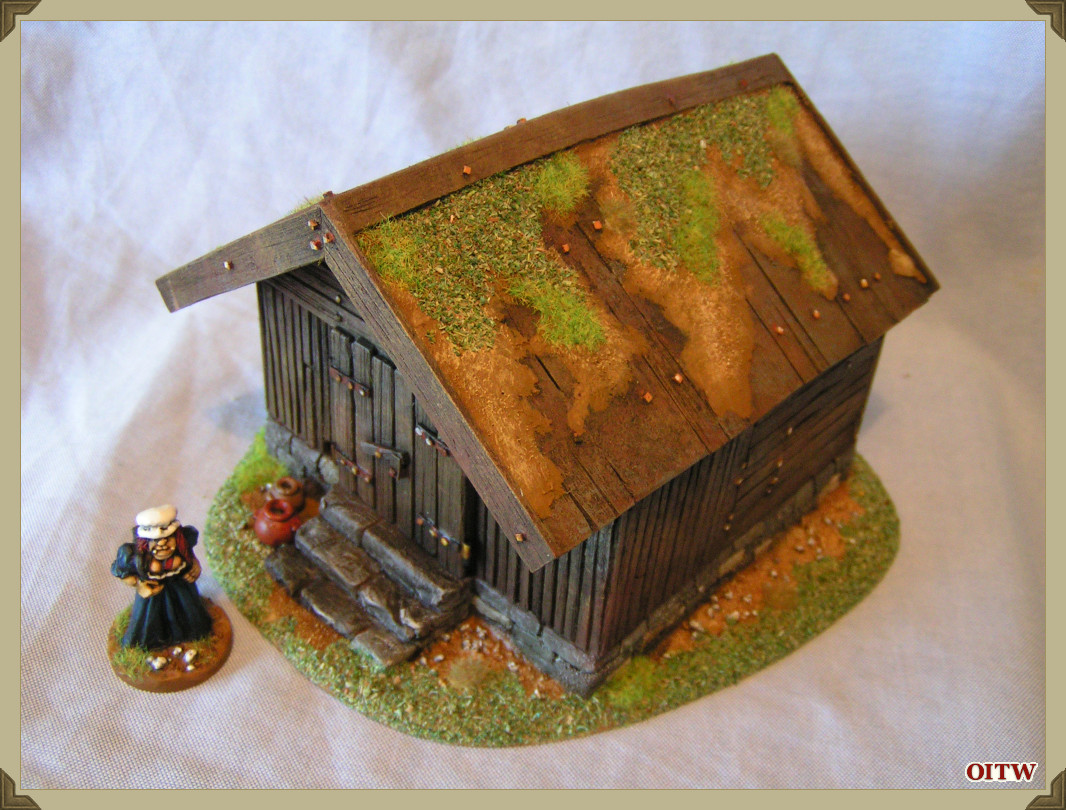
'The Dwarf Lager'
A Modelling Masterclass by Tony Harwood
Master modelmaker Tony Harwood shows us step by step how to build a 28mm scale storehouse.
~
Click on the photos below to open the full higher resolution image.
~
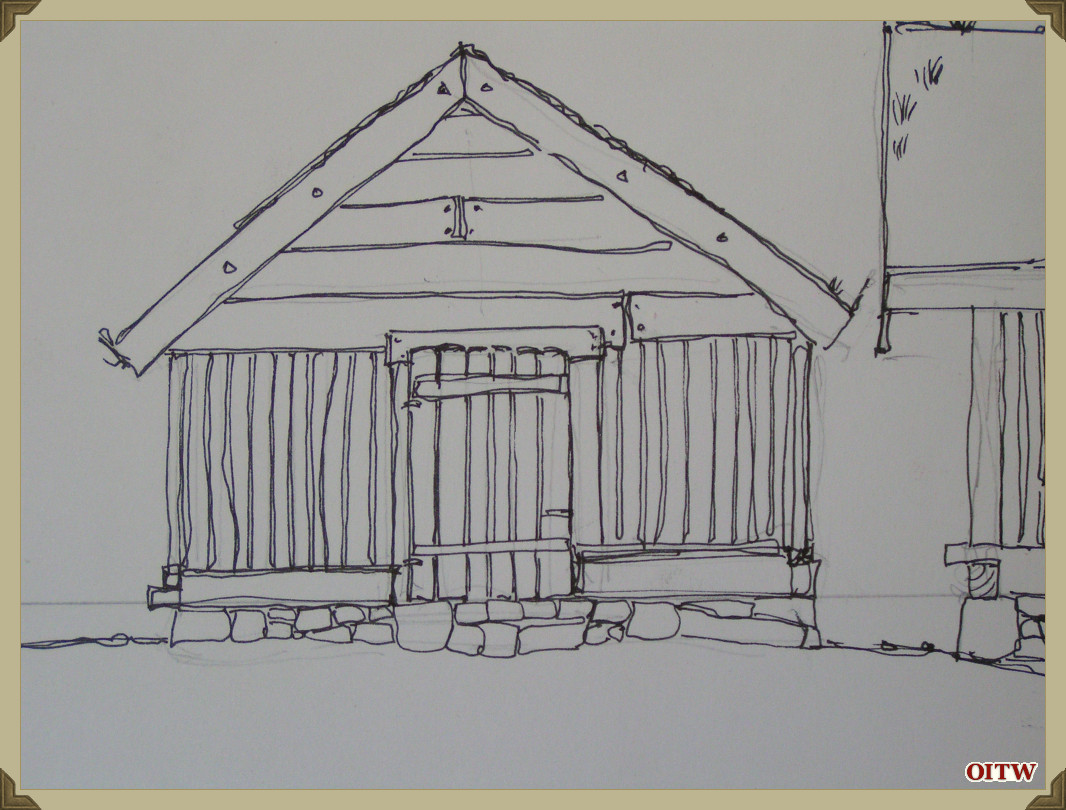
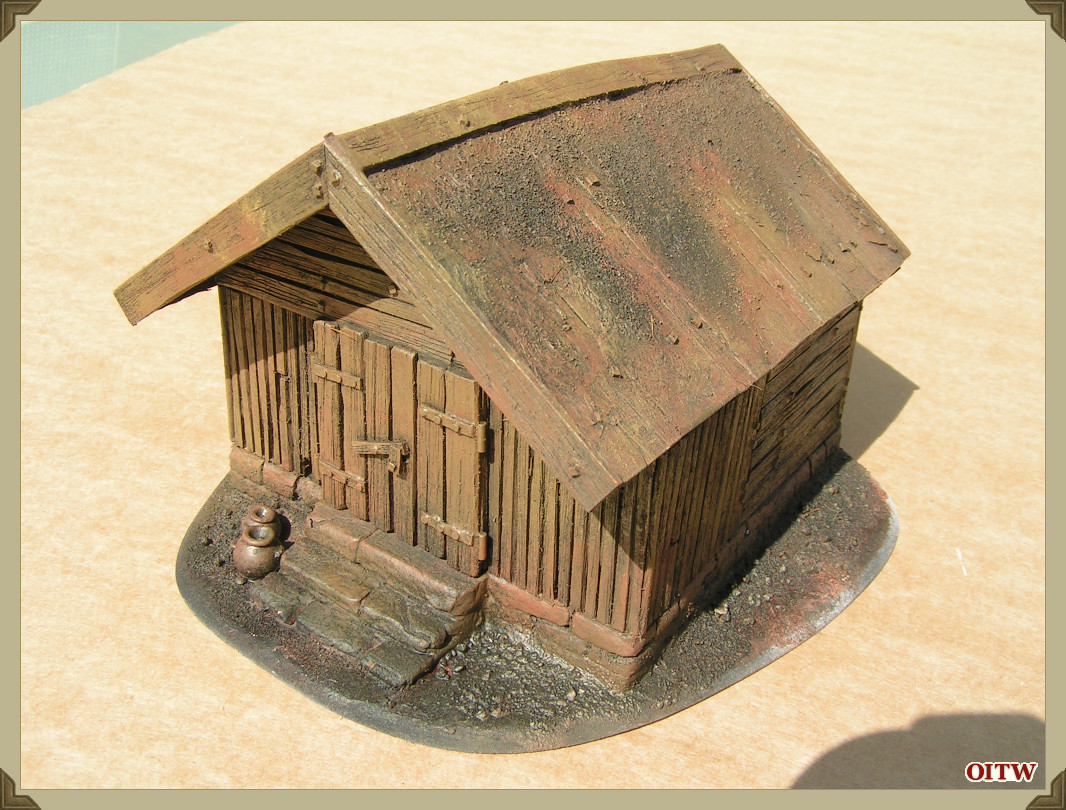
This particular article was inspired by a single photo I found on GOOGLE images of a wooden storehouse or Lager. I wanted to model a simplified version to use as a generic Dwarf (Bier & Bones) or Undead (Witchlands) structure.
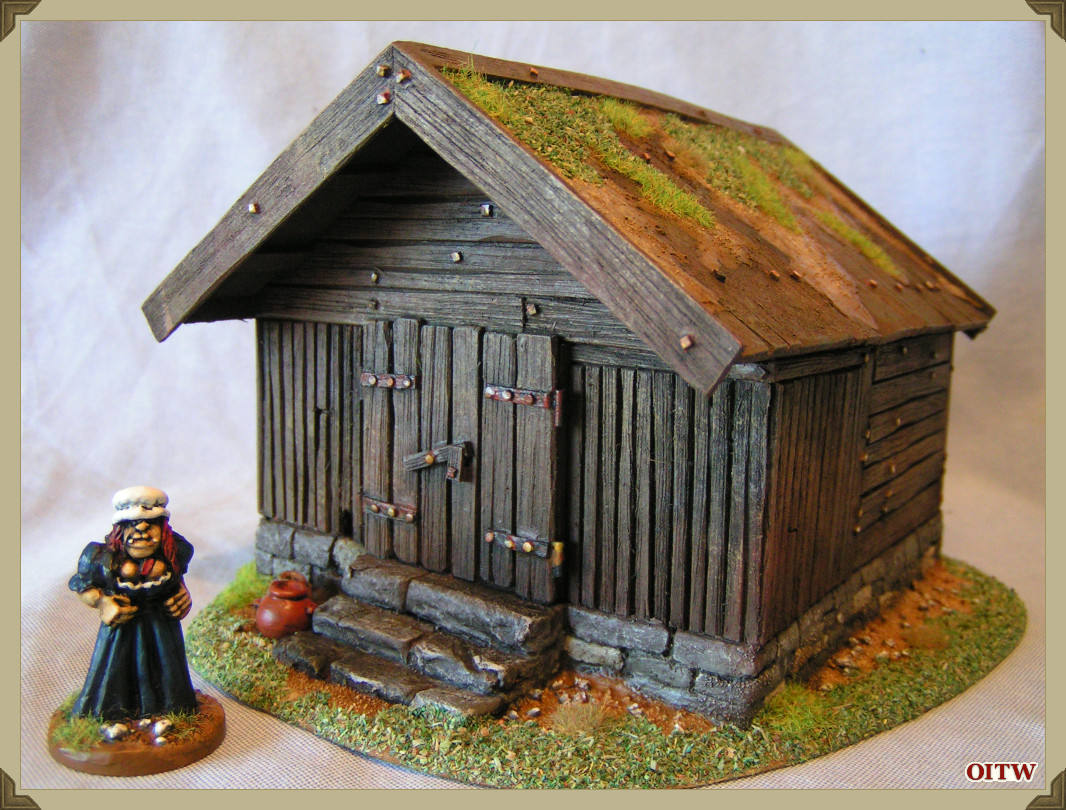
As the building was for my own gaming use and there was no chance of it being reproduced. I designed it to be built as a solid structure and to be as strong as possible. The dimensions were decided upon by using a couple of Flintloque miniatures with the main building having a footprint of 100mm x 100mm.
In addition I have tried to build the Lager (Germanic term for storehouse) out of ‘scrap materials’ or re-cycled material – the sort that any average modeller should have tucked away in his spares box or be a simple matter to purchase.
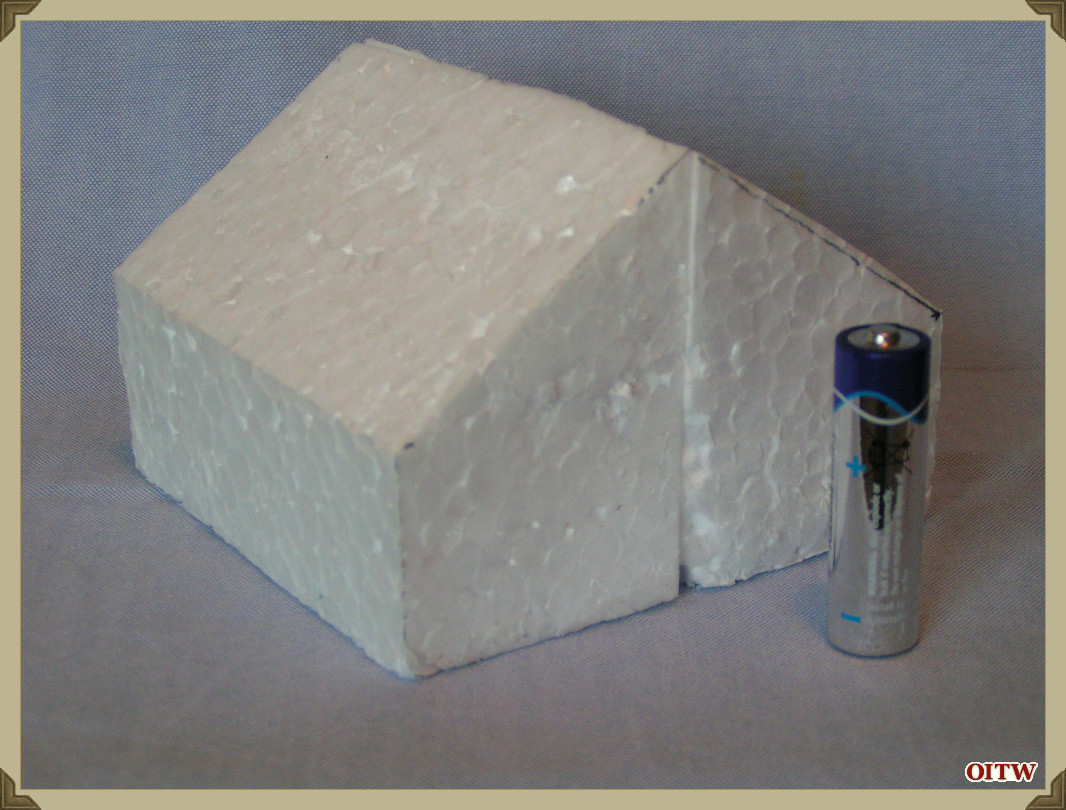
The main structure is built from a lump of white foam, the sort that is used in packaging. I use a large ‘snap-off’ bladed craft knife to cut this foam and would recommend anyone copying this technique to fit a new blade before starting.
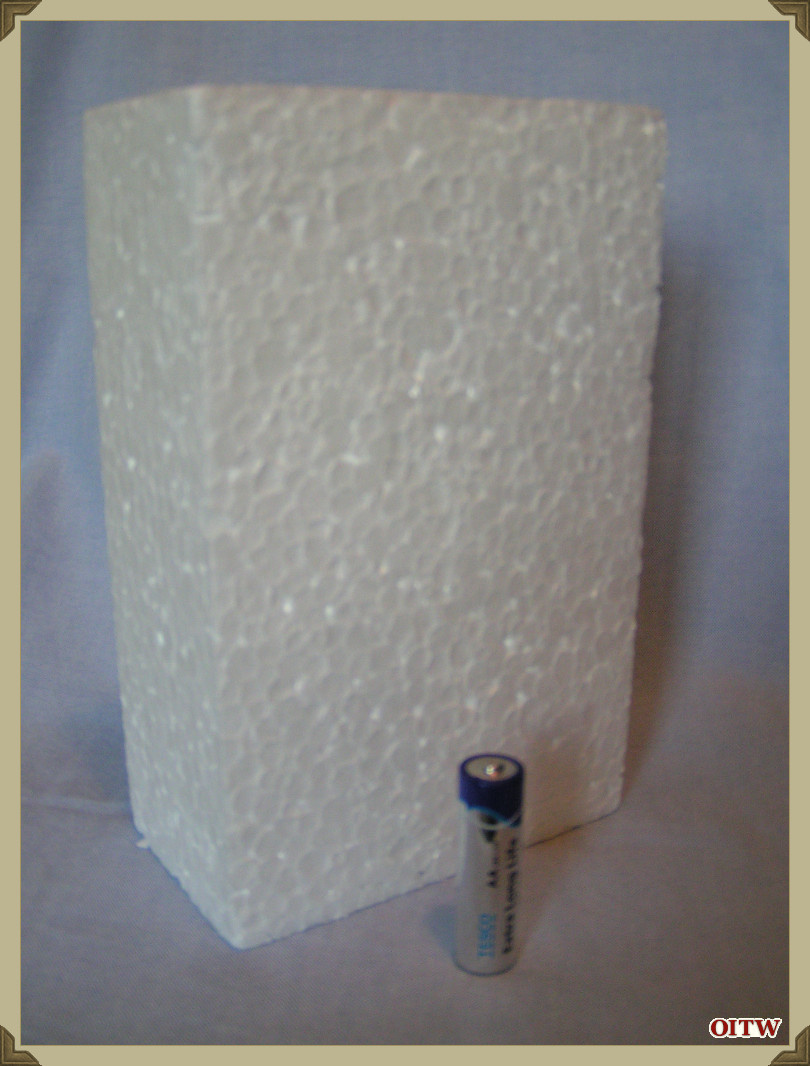
Hint: I have read many terrain building articles that use a similar technique of a simple polystyrene block as the base for the wargame structure. There is no reason why you cannot use layers of corrugated cardboard or foam board. I used this white foam block as I had it to hand.
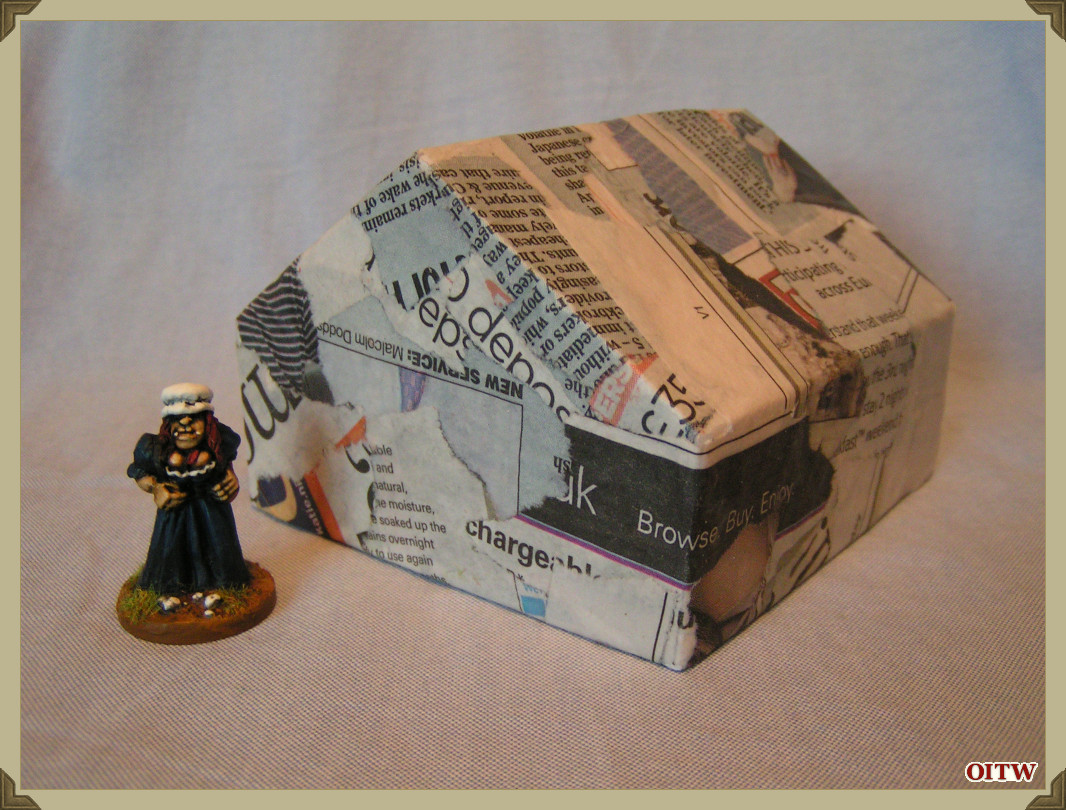
Once the two sides had been glued together and strengthened with some cocktail sticks, I covered the whole building with some torn strips of newspaper. I have used watered-down uPVA glue to stick the newspaper which gives a skin over the otherwise soft polystyrene. It also acts as a base to glue other materials to.
Hint: When using white polystyrene foam I always strengthen joints with pins or cocktail sticks.
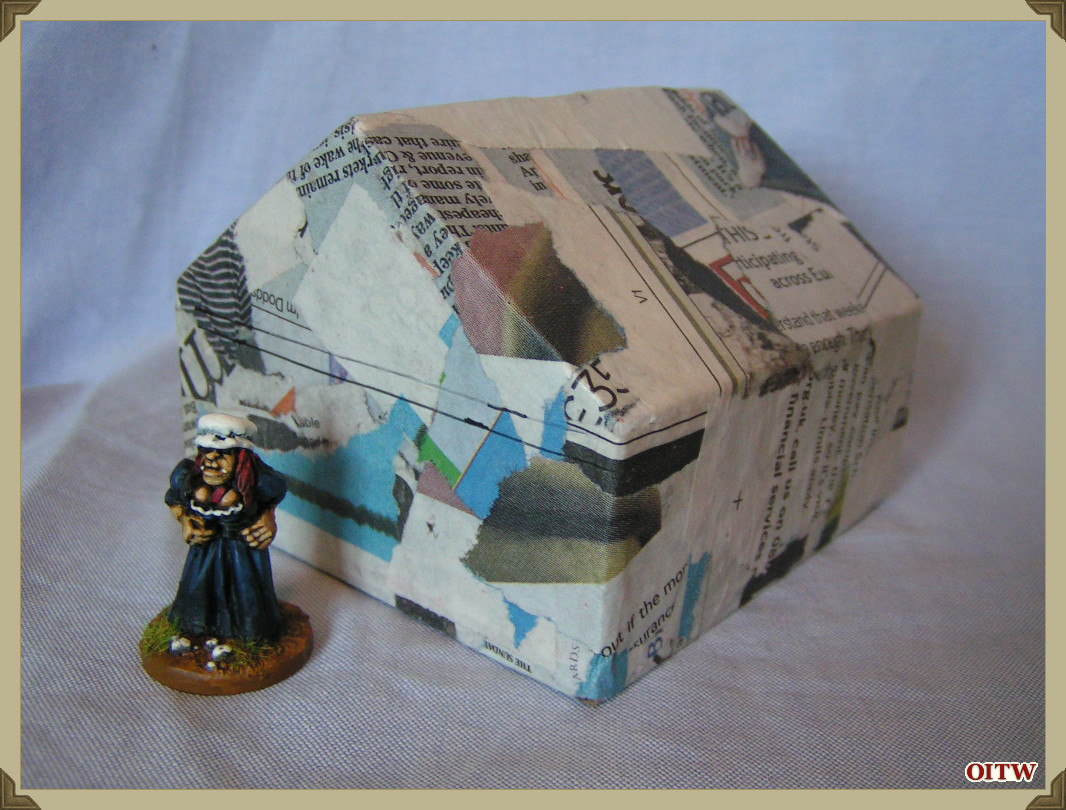
During this stage I realised that the basic structure was not tall enough and therefore glued two squares of simple corrugated cardboard to the base. When the glue was dry – I once again covered the whole structure with torn newspaper and uPVA glue. This next photo shows the difference in height.
Hint: I always keep a based gaming miniature to hand when building structures which I can use to ‘scale’ the piece. It’s an old tip but well worth repeating.
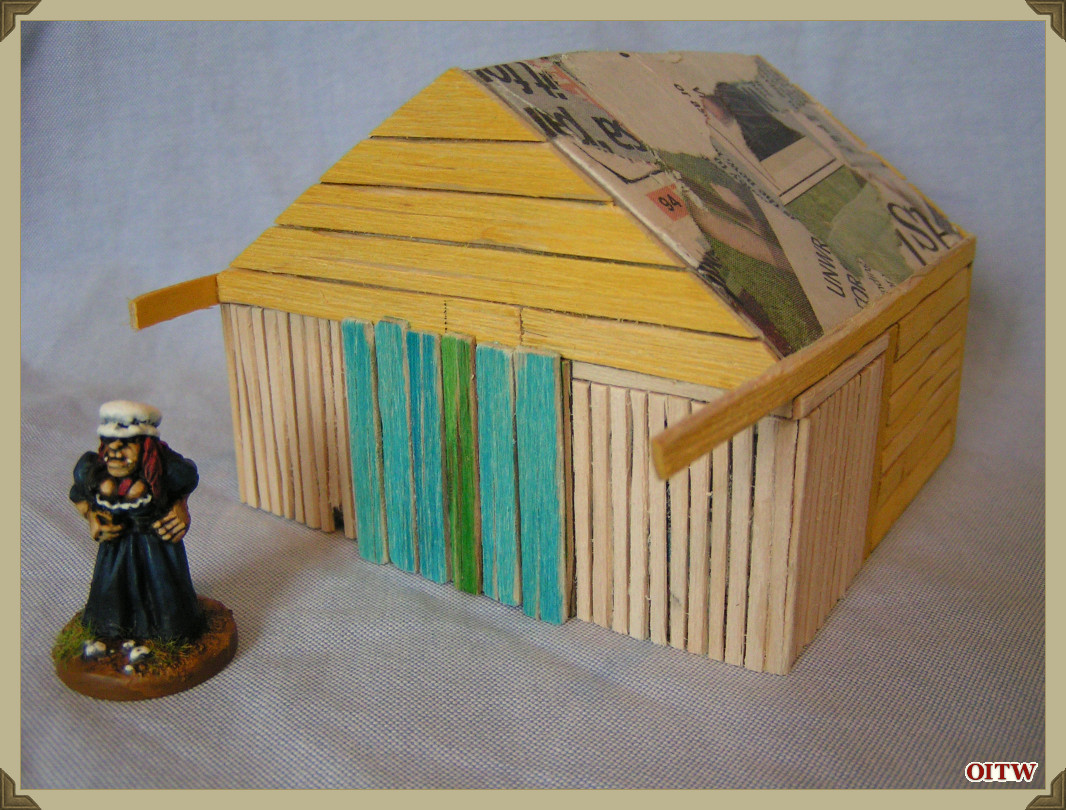
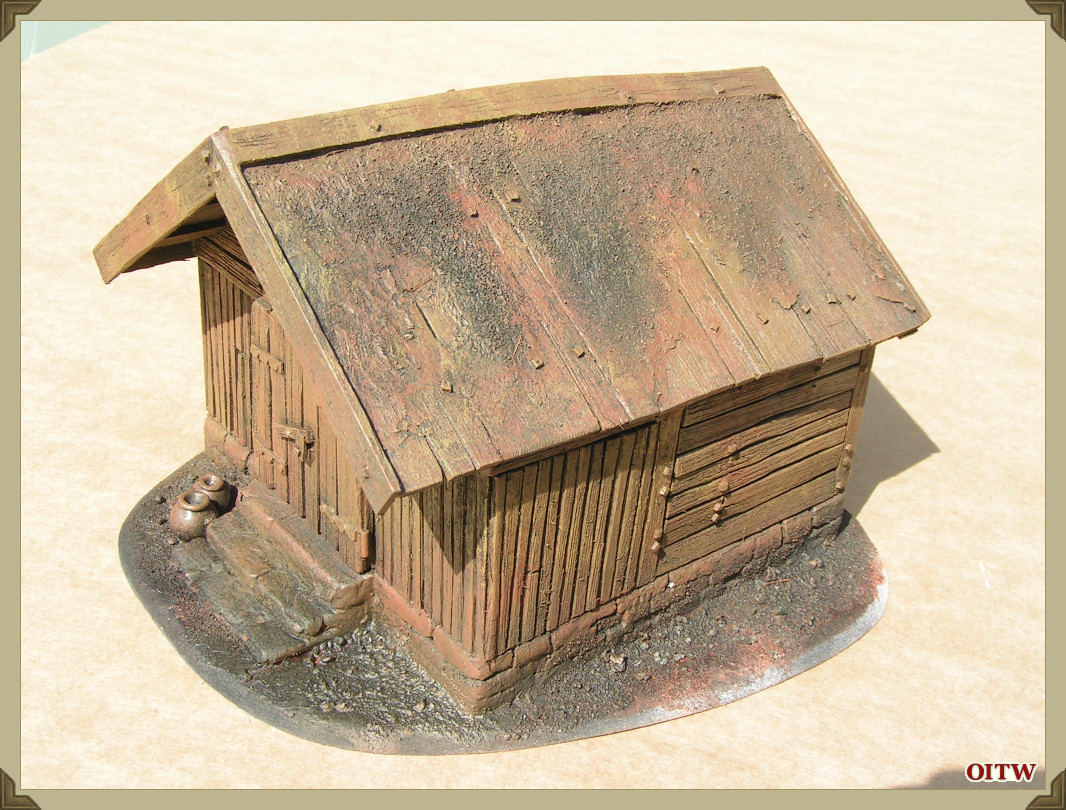
To ‘clad’ the basic shape I have used craft or coloured lollipop sticks. There is no reason why you cannot use these sticks straight from the packet. However I texture the surface by using one, two or all three of the following techniques;
1. Scrape the surface of the craft stick with the teeth of a razorsaw, just drag the blade along the surface of the stick.
2. Rub the surface with some coarse sandpaper, the rougher the better.
3. Use the point of a scalpel to scrape the wood.
A quick rub-down with medium sandpaper will remove any rough edges.
Hint: For some reason coloured craft sticks (lollipop sticks) are much cheaper than natural wood sticks. Buy the coloured ones, as you will be painting them once the structure is complete. You can also use Balsawood and even thick card. I have used all three materials – sometimes in the same building!
Whichever texturing technique you use, I would recommend ‘distressing’ the edges of the sticks to reduce the uniformity. There is no reason why you cannot cut the sticks with a knife and metal ruler – just add some distressing to the edges, it will make a huge difference when it comes to painting.
For this project I have used superglue and accelerator to attach the lollipop stick cladding.
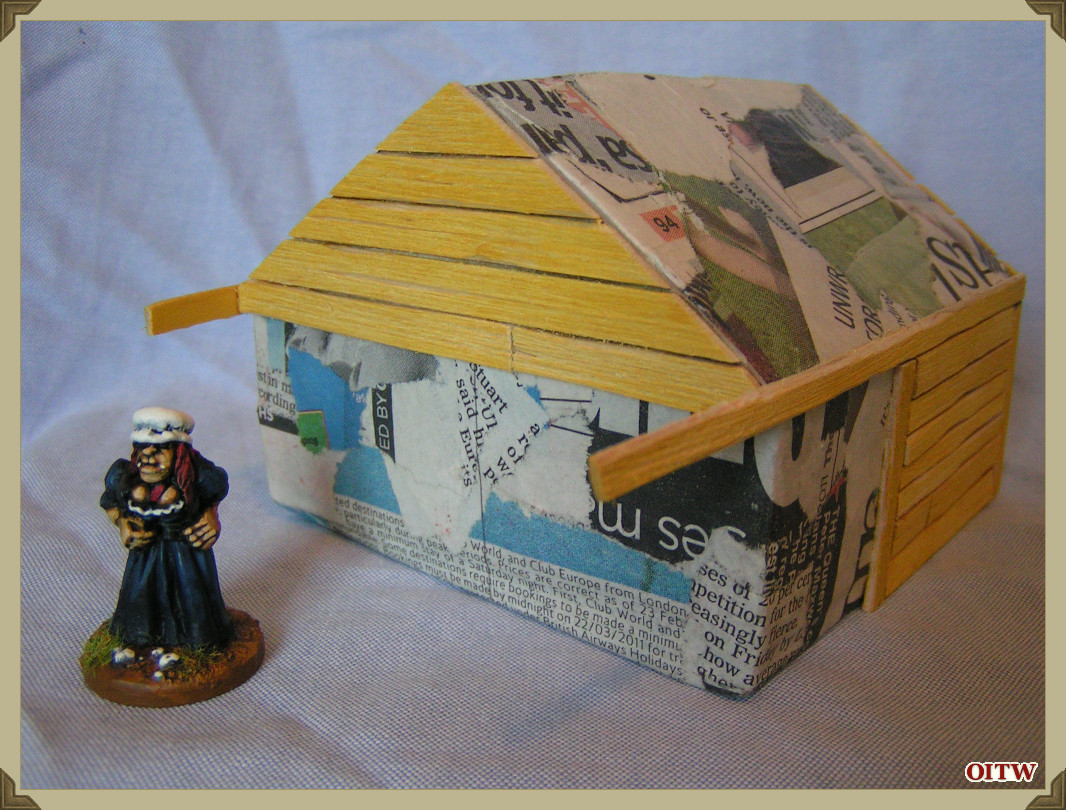
To add some variety and to show a second cladding technique, I have used upright wooden sticks to the front of the building. This cladding was cut from a small sheet of thin wood which came from a wooden Clementines box. (Small oranges sold at Christmas time). I cut the thin wood into strips – distressed the strips and then glued the stakes on. Once dry, I trimmed the edges flush. It is also possible to use matchsticks.
Hint: Look out for thin wood at local markets or fresh fruit stores. Most soft fruit and even some vegetables are still distributed to independent stores in wooden boxes. Once you explain what you want it for, you will be pleasantly surprised at the reaction, a supply of thin wood and free!
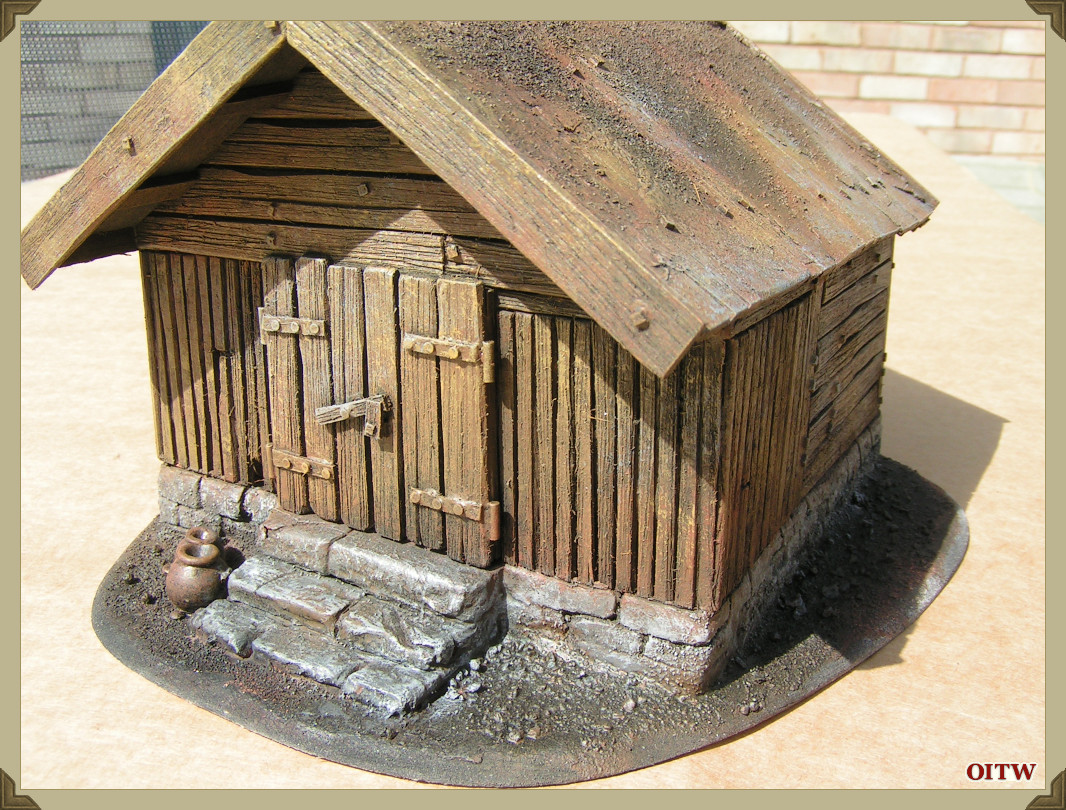
The doors are distressed lollipop sticks.
With the wall cladding complete, I started on the raised base. The initial GOOGLE image of the wooden storehouse shows it built on a rough stone foundation set into a hill. I wanted to have a stone base and looked at building the base from white polystyrene foam however I find that you can inscribe Blue foam easier and with more detail.
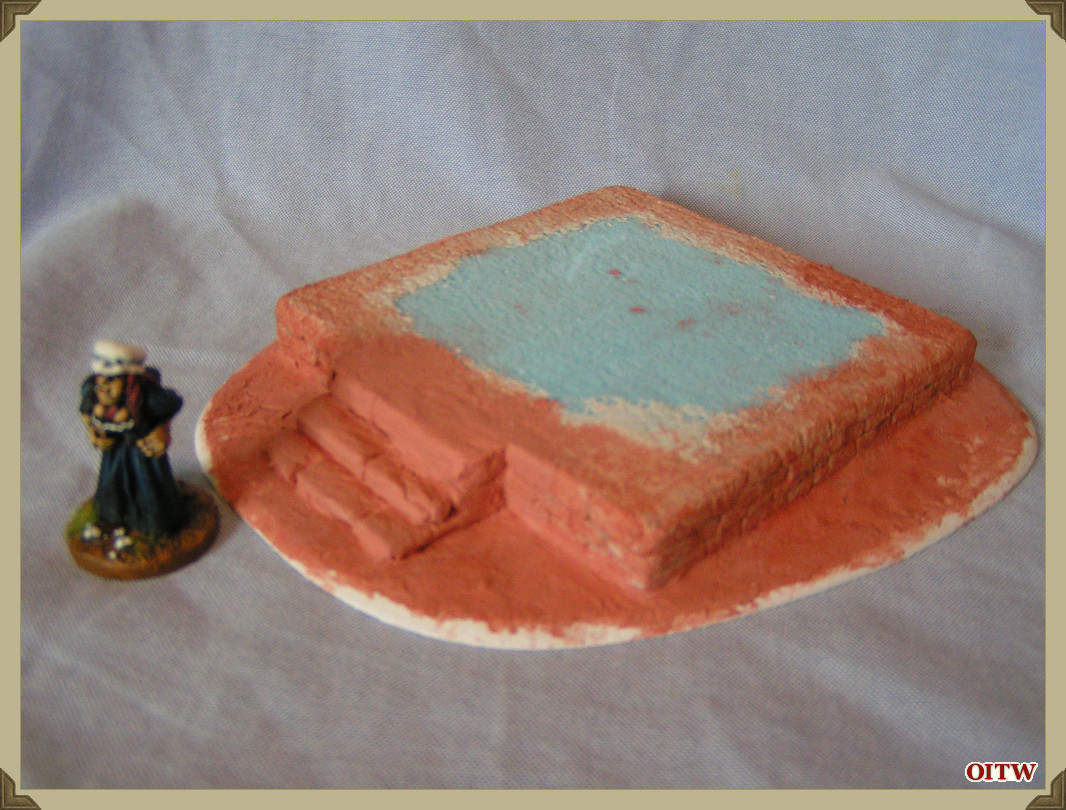
I first cut the foam to size. Then marked out the layers and breaks with a scalpel (remember to use a new blade when working with foam). Once the stones were cut I ran a sharp pencil along the joints to exaggerate them.
The raised stone base was further textured with ready mixed filler, uPVA glue with some fine sand.
The main base is 3mm thick plastic card which I picked up cheap – it was originally used as a ‘For Sale’ sign.
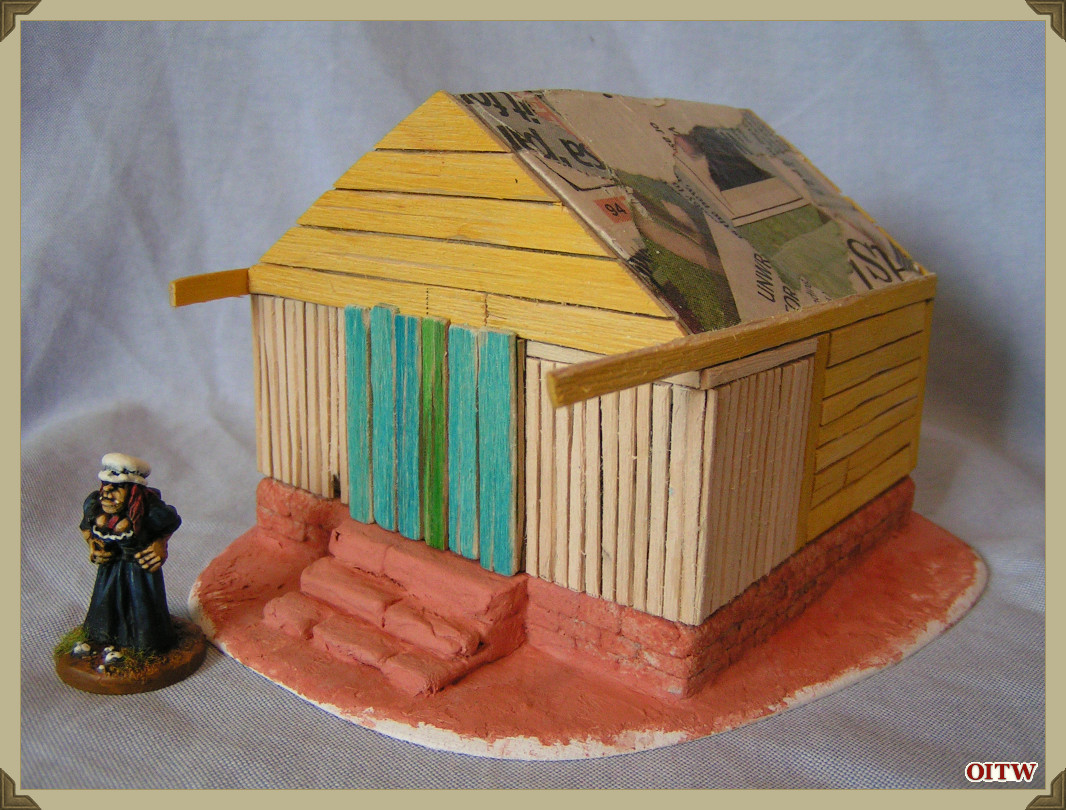
The ground work is built up with DAS terracotta modelling clay.
Hint: I use DAS modelling clay as my preferred basing material. I find the Terracotta DAS is finer, but prefer to use the white DAS as the red terracotta clay can stain clothing. Always use uPVA glue as a bond when spreading DAS over plastic or wood. In this particular project – I had a part slab of the terracotta DAS which I wanted to use up.
The three steps at the front of the storehouse were built up with DAS modelling clay at the same time, then using DAS, uPVA glue and some ready mixed filler, I ‘married’ the stone base into the groundwork by painting on the dilute mixture.
Hint: When basing structures, try to model the building built-in to the groundwork rather than sitting on top of it, a simple way to do this is to build the groundwork up the sides of the building as if the building is partially buried in the ground. I have read modelling articles that actually dig trenches or holes in the groundwork to house the building which mimic this effect.
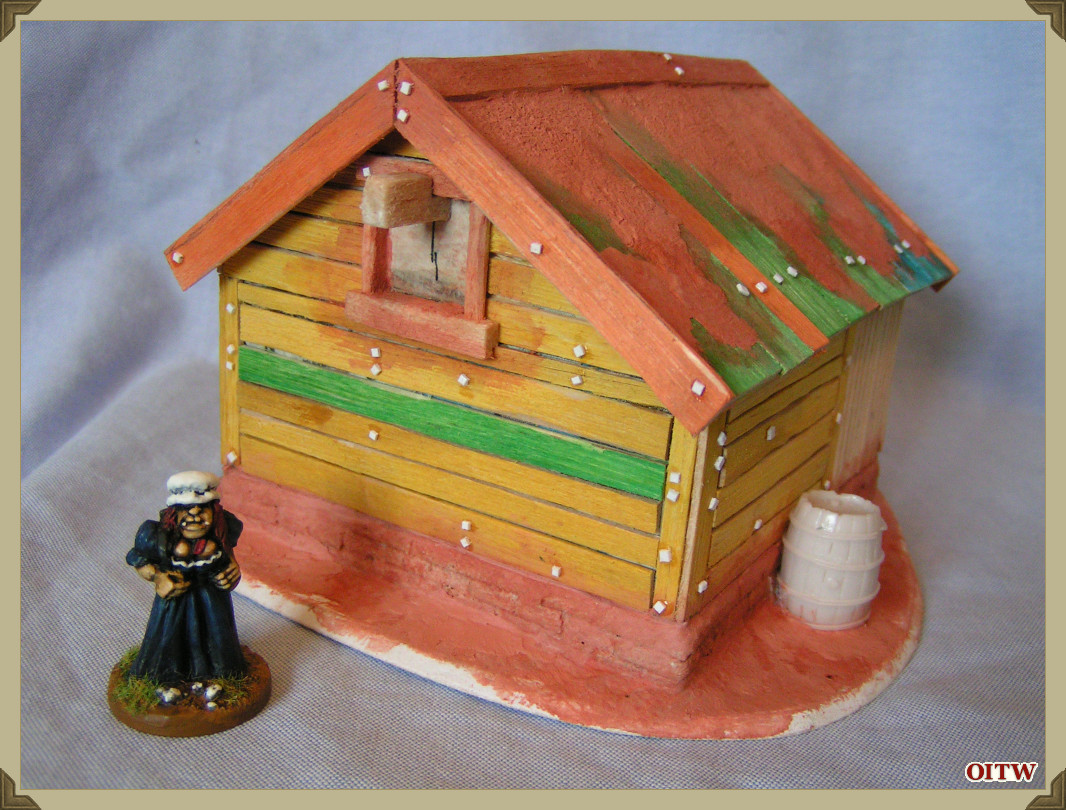
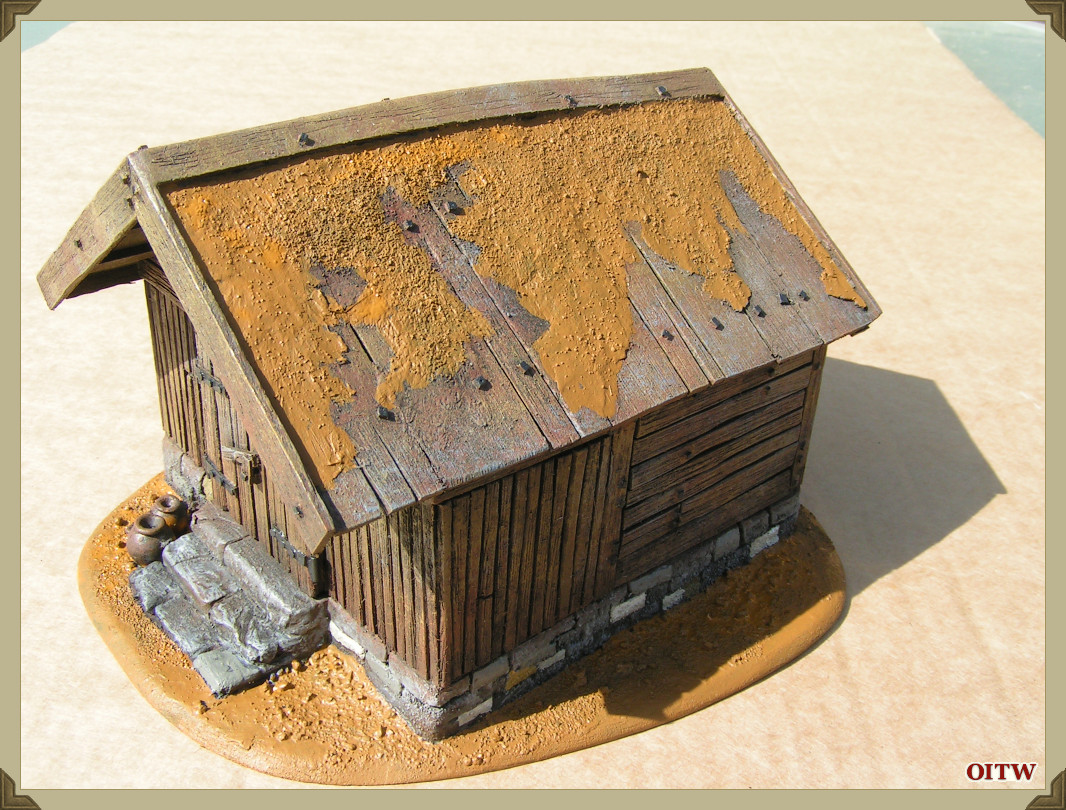
The next step was to roof the structure. Once again I used distressed craft/lollipop sticks glued in place with superglue. I have textured the roof with thin layers of DAS which has been stippled with a stiff brush. You will notice how I have not attempted to cover all of the lollipop sticks, but preferring to leave some of the wood grain showing.
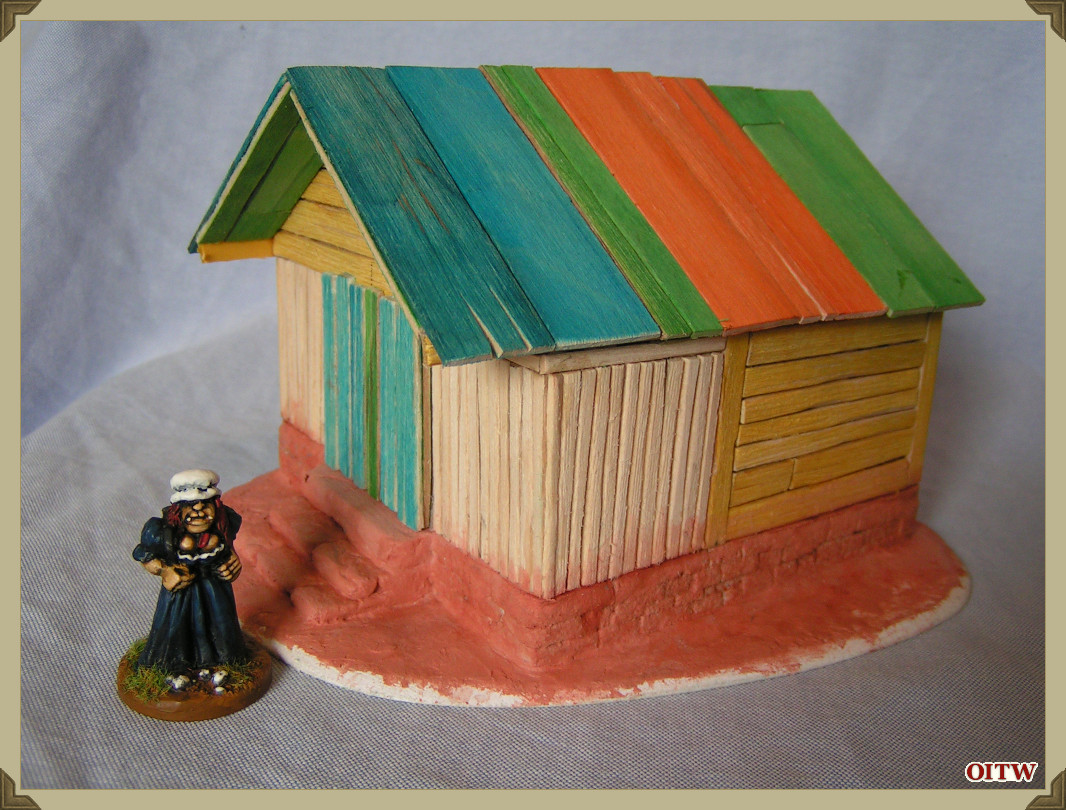
Later I detailed the front and rear of the roof with a couple of strips of lollipop sticks and used the same on the roof eaves.
Now for my favourite part of the build – detailing! You can see that there are dozens of small plastic card slivers stuck on the roof and sides. These are obviously over-scale, however once painted they will add loads of character.
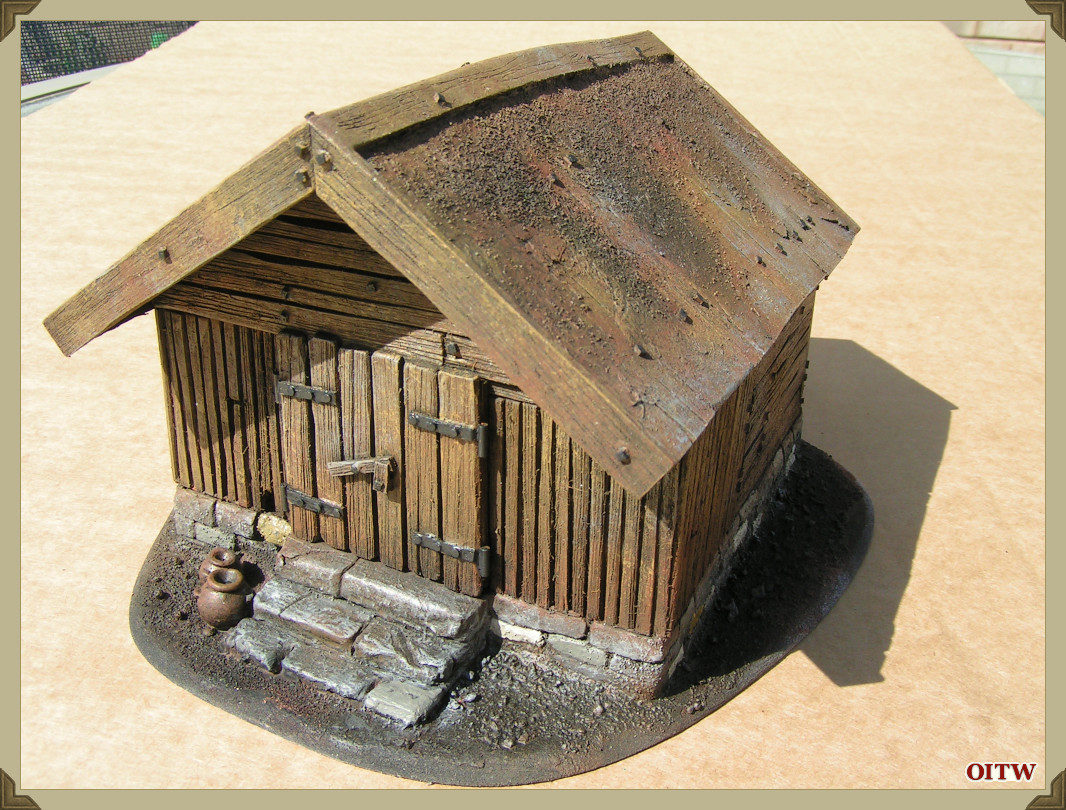
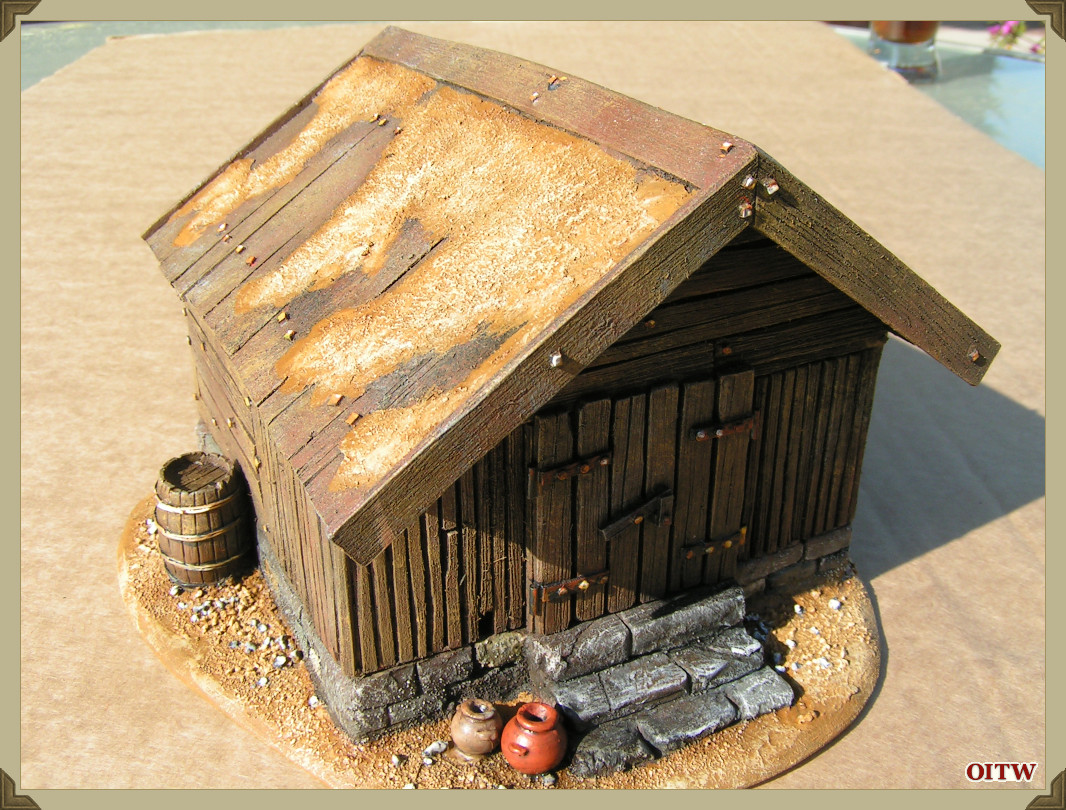
I have also added hinges and a simple lever door lock to the two main doors. These are simple plastic card/plastic rod strips or slivers superglued to the doors.
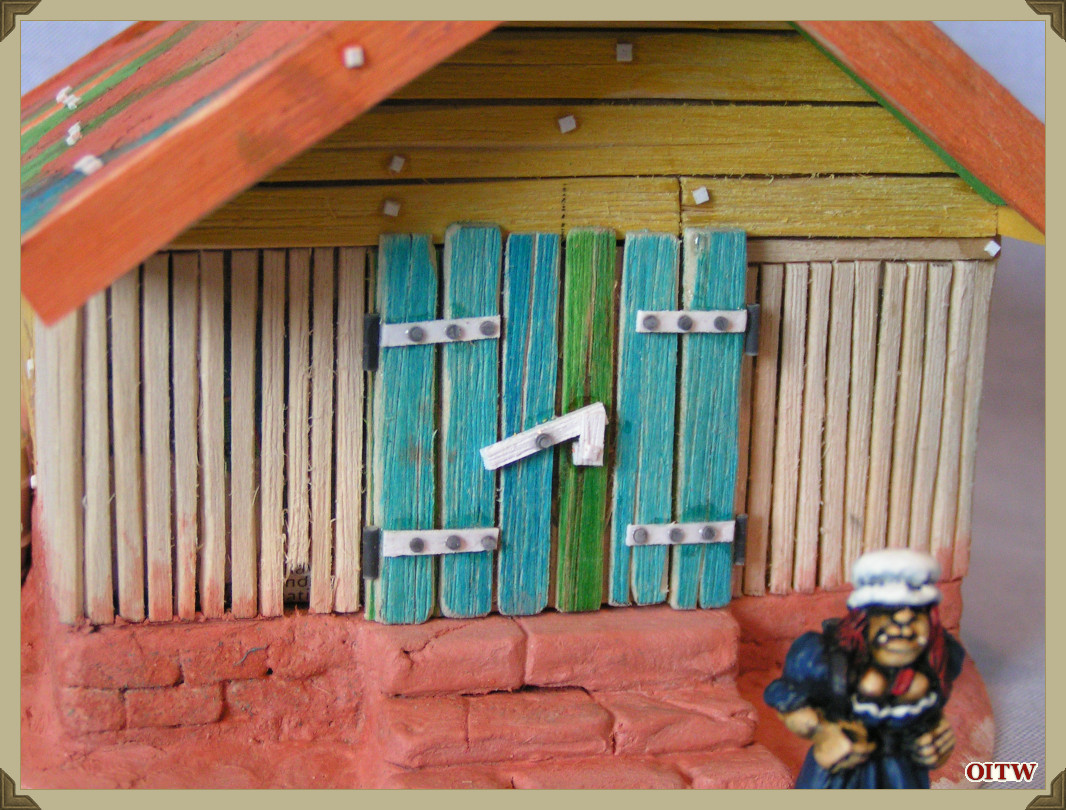
Hint: I love adding these little surface features. They are over scale and in the main random, I tend to use artistic licence when adding these details and am not trying to add every one – more an impression of detail, which I feel fits with may particular modelling style and with the over-the-top Flintloque character miniatures. I pour a small drop of superglue onto a scrap of plastic card, then using a cocktail stick transfer to glue to the point I want to add the small detail. Then using a No. 11 scalpel (the pointy blade) pick up the small sliver and then add it to the building.
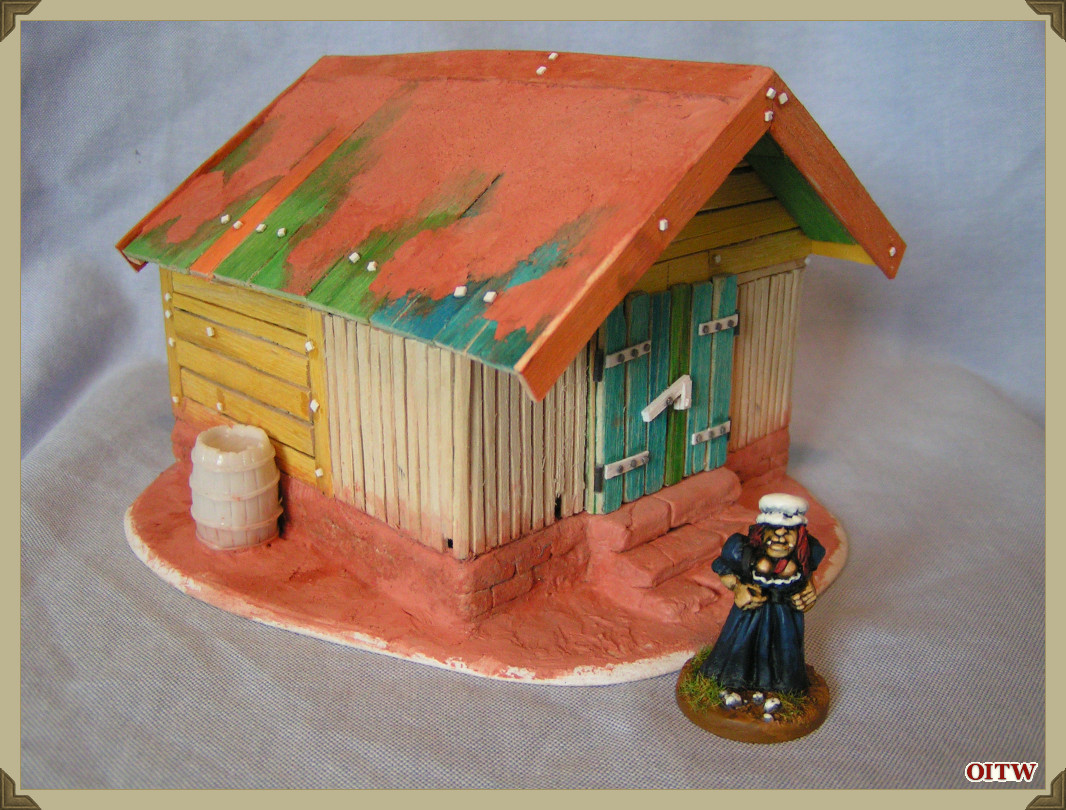
I have added a resin barrel to the side of the building. The ‘master’ for this large barrel was sculpted by me for Grand Manner some time ago and I am lucky enough to have a large supply, however there are many companies who produce such detailing parts. The barrel is superglued to the base and then blended in to the groundwork with a small amount of DAS.
Hint: I tend to scour ‘bring and buy’ or reduced bins at wargame shows/trade shows for small details like these resin barrels and keep them in a small plastic box which I add to building like this. I feel that small additions like this add even more character as well as making the terrain looked ‘lived in’.
The final stage in modelling this storehouse was to texture the groundwork with small stones, talus and sand.
My preferred technique is to paint on random areas of uPVA glue and then scatter, first large stones, then smaller stones and finally sand over the base. I find that a dribbling of water over the finished groundwork and even a dabbing with a wet paintbrush blends the different basing materials together.
I also added some very fine sand to the DAS covered roof areas.
Hint: I keep a multi compartment plastic box full of different grades of small stones and sand. When I am basing terrain (or figures) I tend to pick up different size stones and sand to sprinkle on to the wet uPVA glue. I know that some modellers use ready mixed sand and talus for basing, I prefer to mix the grades myself on the figure or base.
With the construction completed, it is now time for painting.
Painting the Dwarf Lager
I have started by spraying the whole building with Games Workshop Chaos Black. Even before this was dry, I sprayed the model with Tamiya Brown in a rough ‘splatter’ pattern for above giving a mottled Black/Brown colour.

With a large stiff brush I drybrushed a rich red/brown called Maple Syrup from Folk Art across the whole model. This gives a much ‘warmer’, richer base colour.
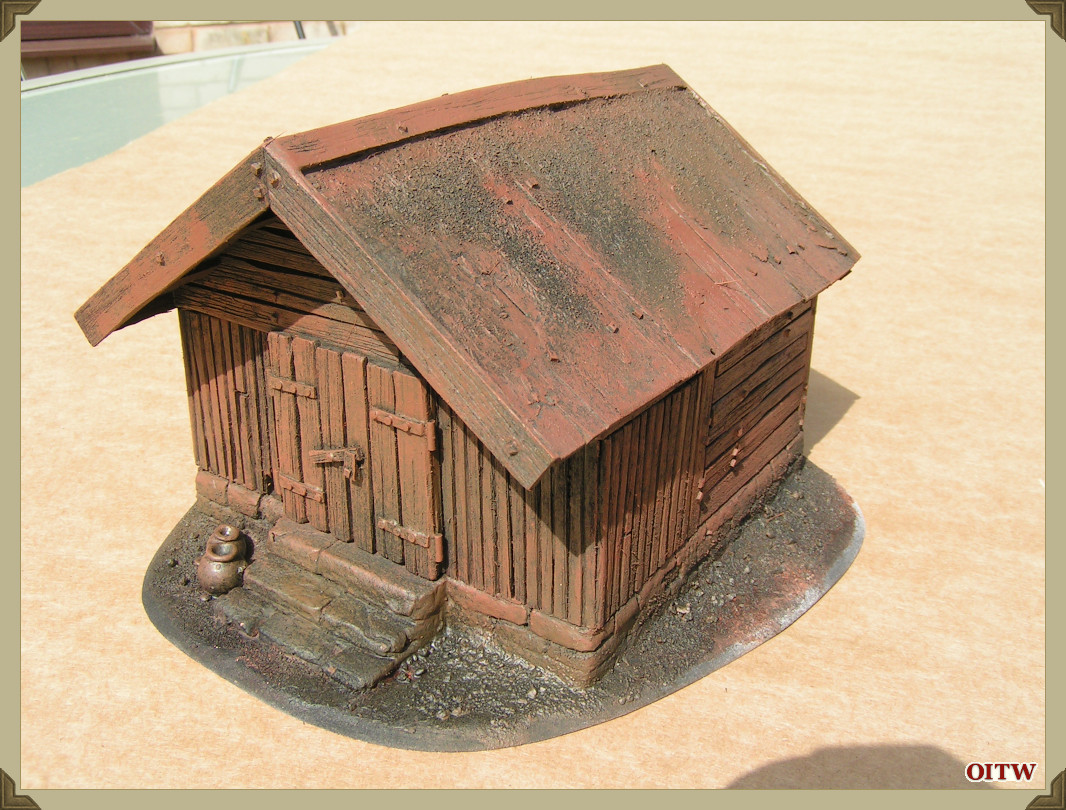
Using the same brush I then drybrushed Raw Umber again from Folk Art across the upper surfaces.
The third drybrushing was Raw Umber and Yellow Ochre. Then a further layer, this time with more Yellow Ochre added.
The latest drybrush was a very light pale Grey, just on the very edges, which ‘dulls down’ the brown and reds and gives the wood an impression of age.
I also took the opportunity to give the stone base a first drybrush of Stonewall Grey (from Vallejo) mixed with a little Snakebite Leather from GW.
In this photo I have started to paint the detail features, such as the door hinges, roof fixtures and wall nails with Chaos Black.
The Groundwork has been painted in my favourite earth or groundwork colour - Snakebite Leather from GW. I have also painted random sections of the roof with the same colour.
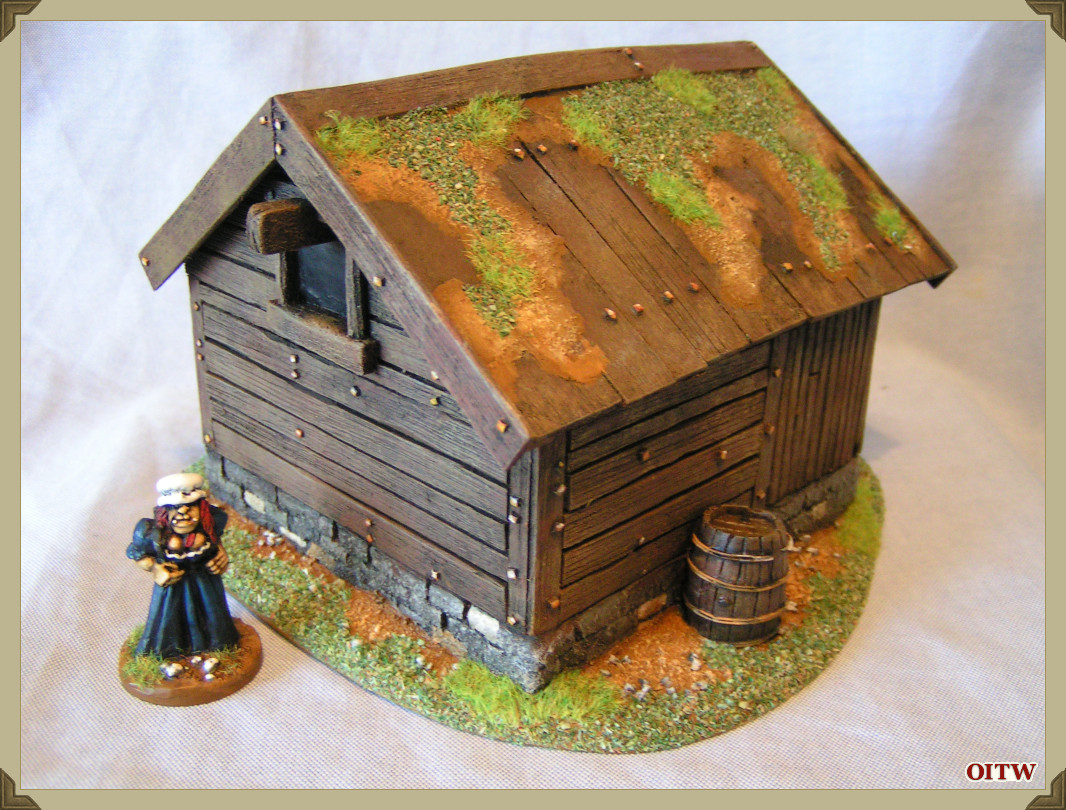
The roof is highlighted with Snakebite Leather and a touch of Skull White. The second highlight is the same paints, but with more White. I have also picked out some of the stones with a mix of Chaos Black and Skull White. This is my usual basing formula and by painting ALL my terrain in the same colours and techniques I believe that I have a range of gaming pieces that are uniform.
You can also see that the two small pots (resin castings from Grand Manner) have been painted – one Terracotta and the other with Elf Flesh both colours from Vallejo.

The next couple of photos show even more detail painting. There are a couple of areas that I concentrate on – mainly highlighting and/or small character features.
Once the fussy painting has been completed, I have added railway scatter material to the base and roof with small patches of nylon grass both of which are glued down with uPVA glue.
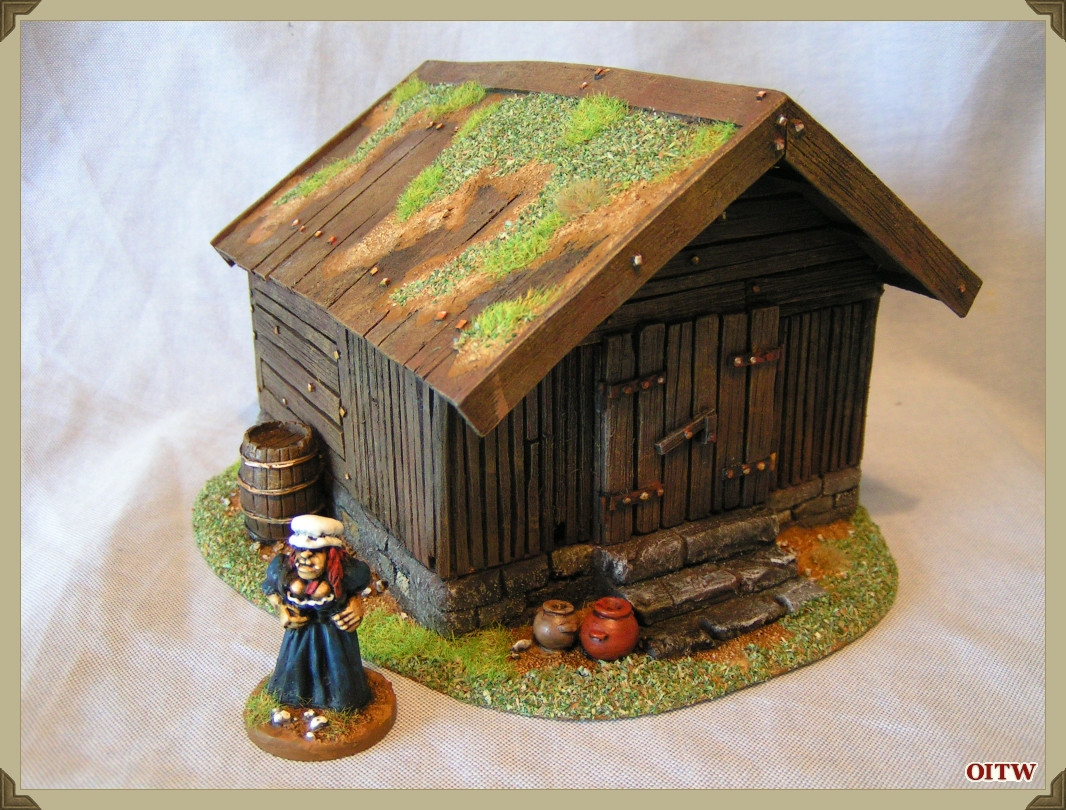
I am sure that every reader will have his or her own technique for painting terrain. This is mine and I like the effect – a little cartoon-y which I think works well with my painted Flintloque miniatures.
Looking back – I think that I could have made this particular piece a little smaller, maybe 90mm x 90mm rather than the 100mm x 100mm.
~
Webmaster's Notes
This article was originaly published on Alternative Armies' content portal, Barking Irons, and is reproduced here with permission from the author.