![]()
"Korunna Arch"
A Modelling Masterclass by Tony Harwood
~
Click on any image below to enlarge it. - Craig.
~
Introduction
Some time ago I was asked by Gavin Syme of Alternative Armies if I would produce a Masterclass Modelling Article based on the then to be released Flintloque Gaming supplement Retreat to Korruna. The Gaming Guide or Scenario Supplement was obviously going to be based on the famous retreat by Sir John Moore during the Napoleonic Peninsular War. I agreed and started looking around for a suitable terrain piece to model.
There are not many pieces of suitable terrain or even structures for this action but one image that struck a chord with me was an illustration in the iconic Children’s Magazine Look and Learn; Moore’s Heroic Stand at Corruna delayed Napoleons Spanish Conquest. Look and Learn 678 from January 11th 1975, see this link for more details.
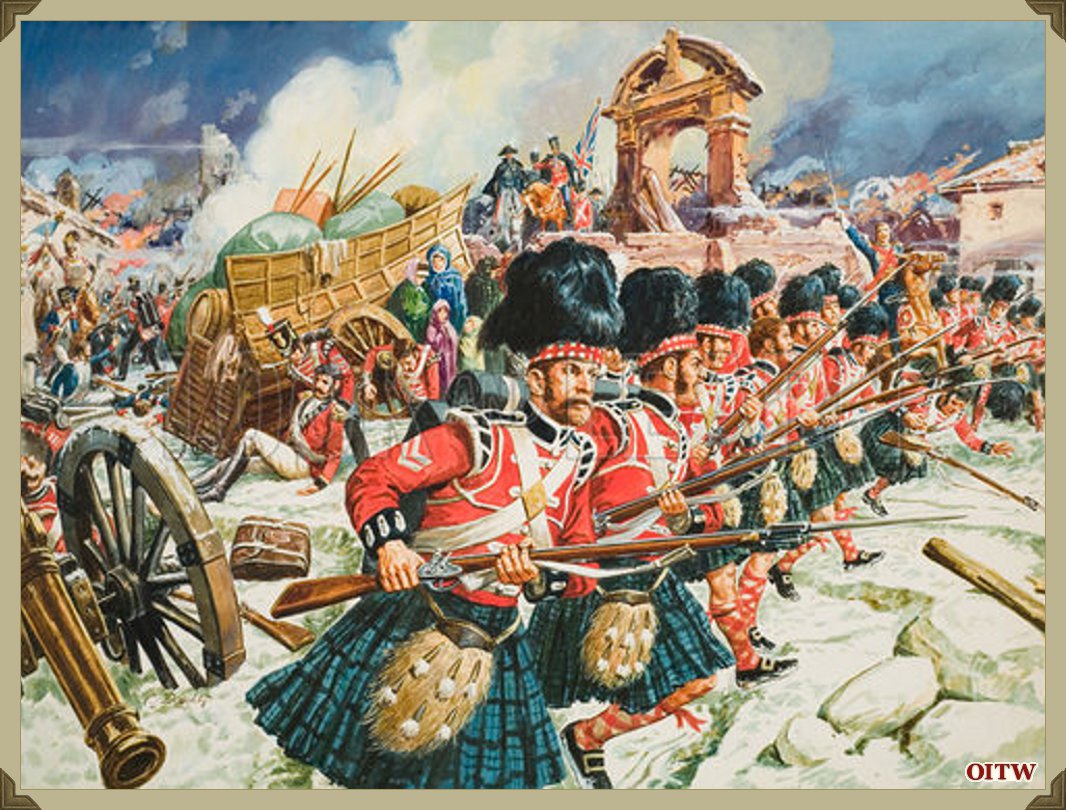
The golden coloured monument (or gate) in the centre background was just what I was looking for and after checking out the original painting - Defence in Corruna by CL Doughty I produced this quick sketch.
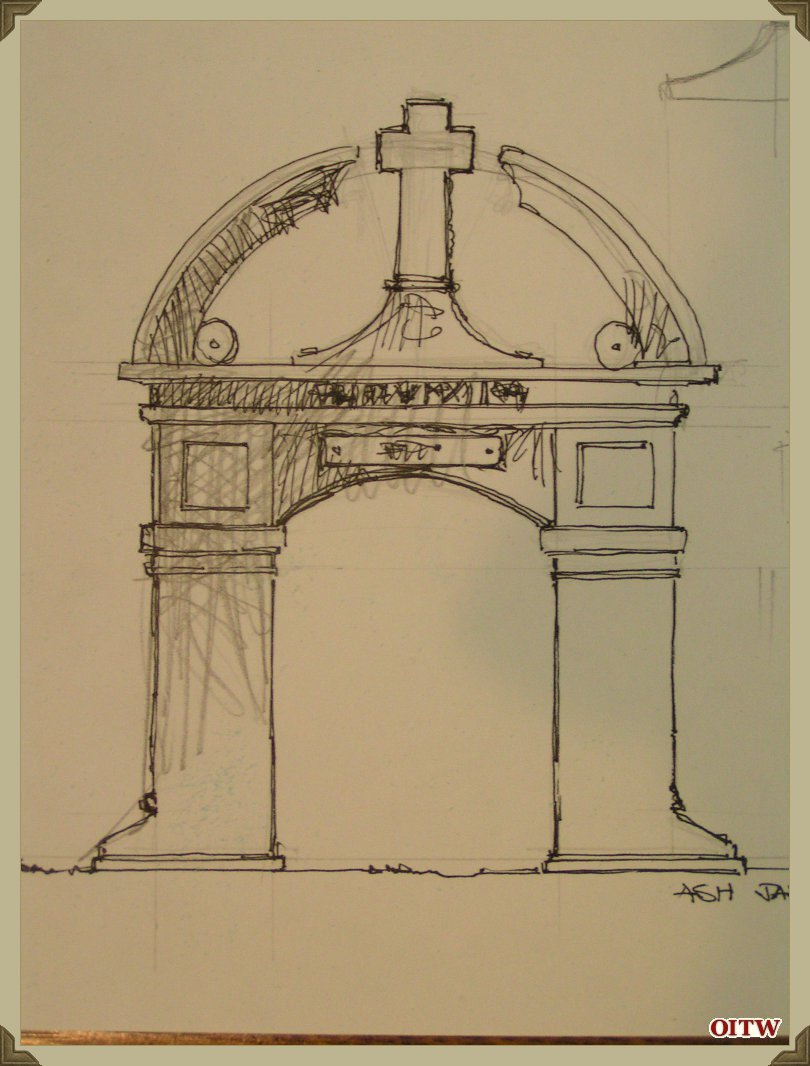
I have no idea what the painting is supposed to represent, whether this is an actual event or one made up by the artist. I just knew that I wanted to model it...
Construction
The actual construction was carried out over a couple of days during early 2013. As the snow lay on the ground, I was not able to retreat to my usual haunt, the-shed-at-the-bottom-of-the-garden, but was relegated to the kitchen table. Using materials that were readily to hand (and that would not cause too much of a mess) I proceeded to build my own monument.
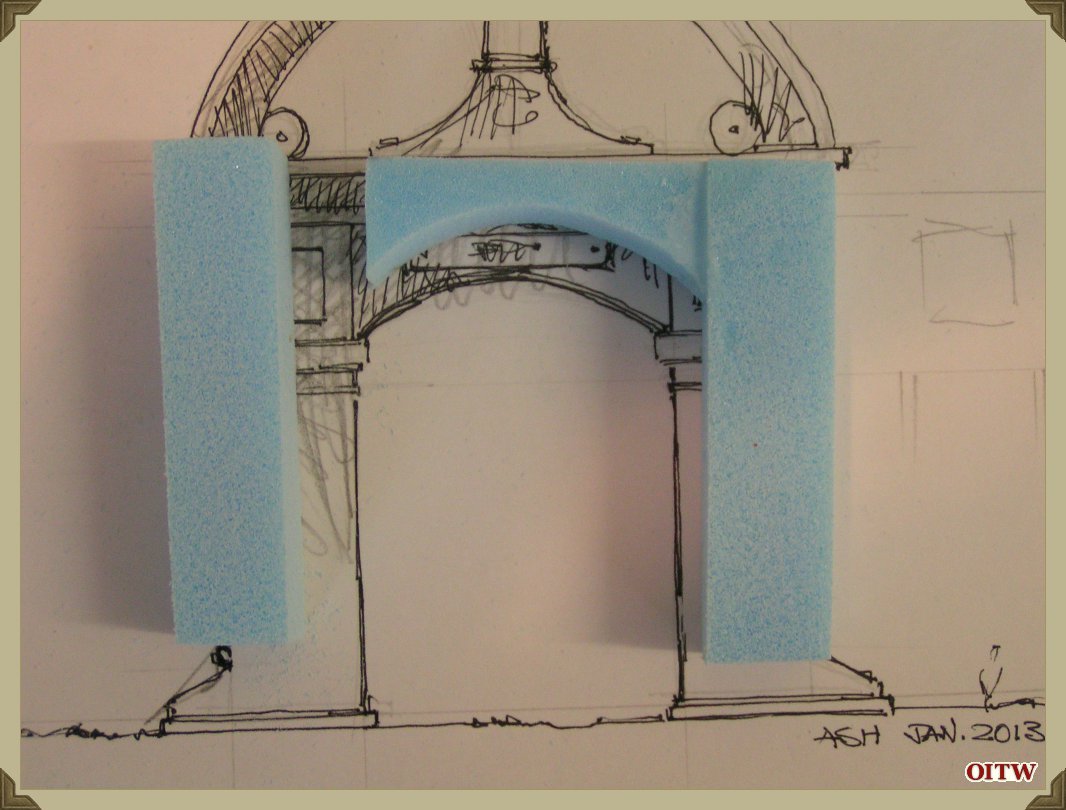
Blue Foam was cut to shape – a 20mm x 20mm column and then trimmed to size following the initial sketch. At the same time a central arch was cut from a Blue Foam off-cut.
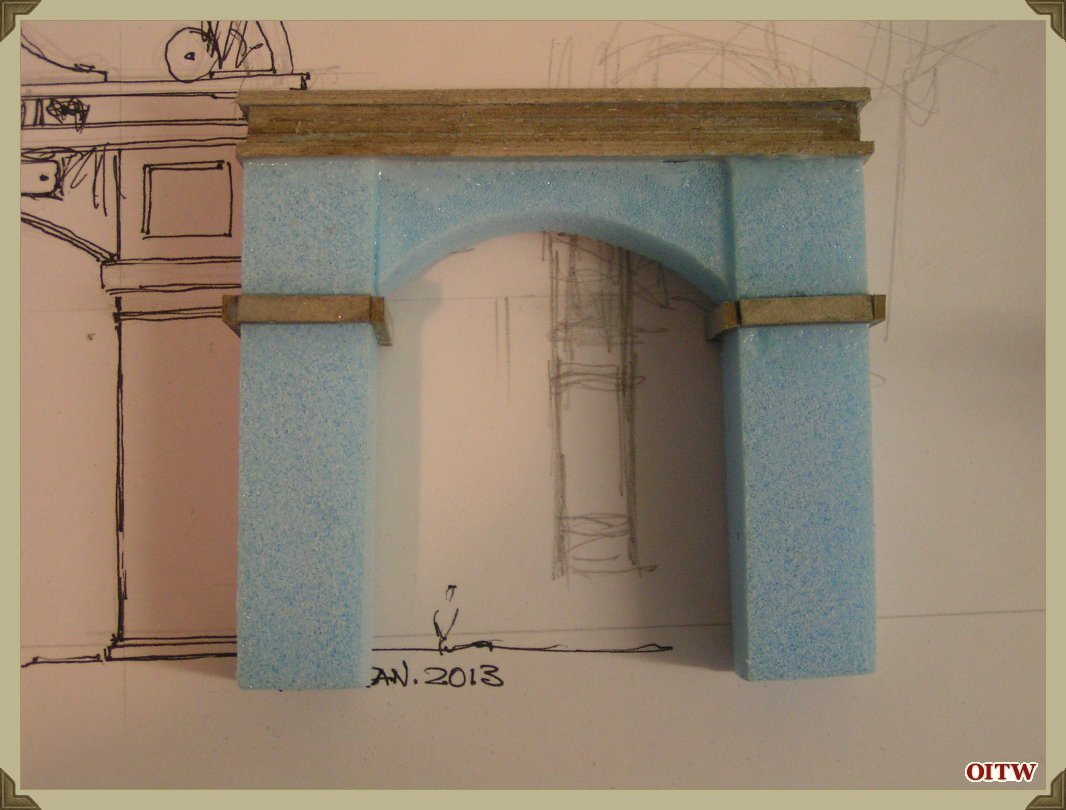
The two columns and central arch were glued together with uPVA glue. The joint being strengthened with a couple of trimmed cocktail sticks, pressed into the foam.
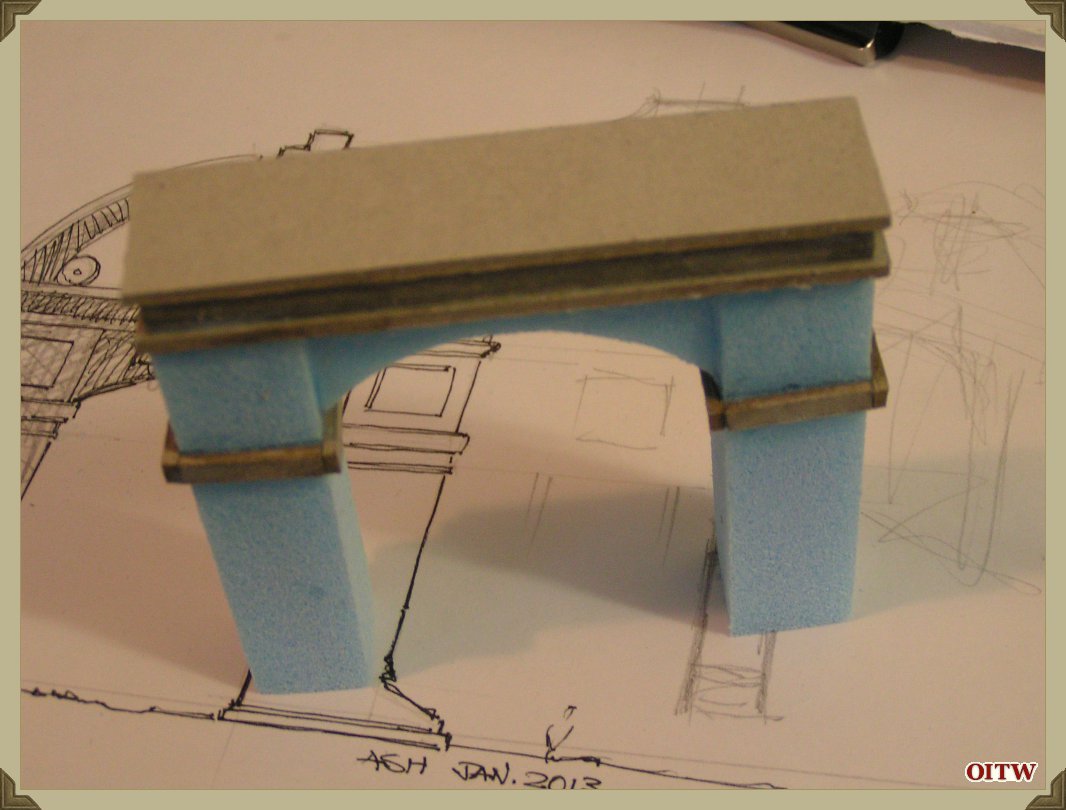
Cardboard trim was added around each column and a central arch topping from some scrap card (the backing board from an A4 notepad). I have used both uPVA glue and superglue to build up these pieces as I wanted to proceed quickly.
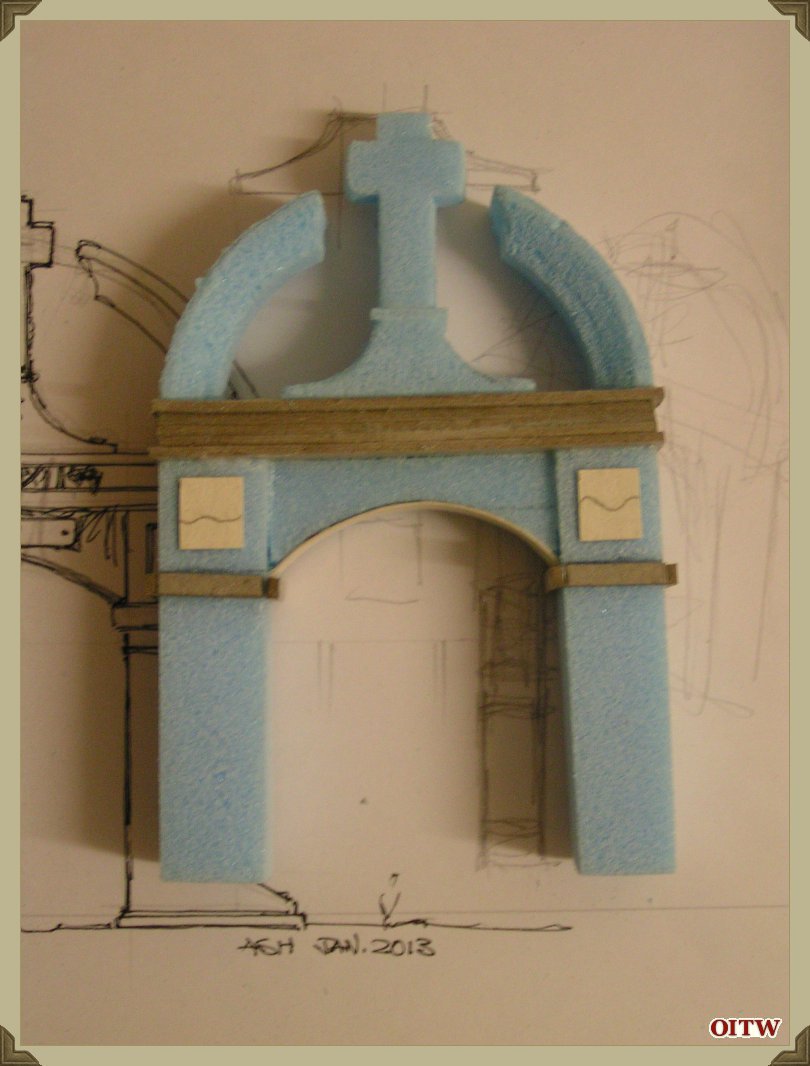
I built the two arch sections from an off-cut of foam. I first trimmed the foam to the correct width (20mm) and then using a lid of a biscuit tin/tube (a Christmas present) I marked-out and then cut a half circle. This was then trimmed to the correct depth (10mm) and carved with a scalpel to give the distinctive scallop edges. Once I was happy with the shape – I used some sandpaper to refine the shape.
This single arch was then cut into two identical sections and superglued to the top of the archway.
The central stone cross and cross base were modelled in the same manner – starting with the base section I trimmed and sanded some foam and then added the cross. There is a whole wooden cocktail stick stuck through all three sections of this cross prior to supergluing to the top of the arch.
Cardboard panels or reliefs were stuck to the upper archway sides (two to each side).
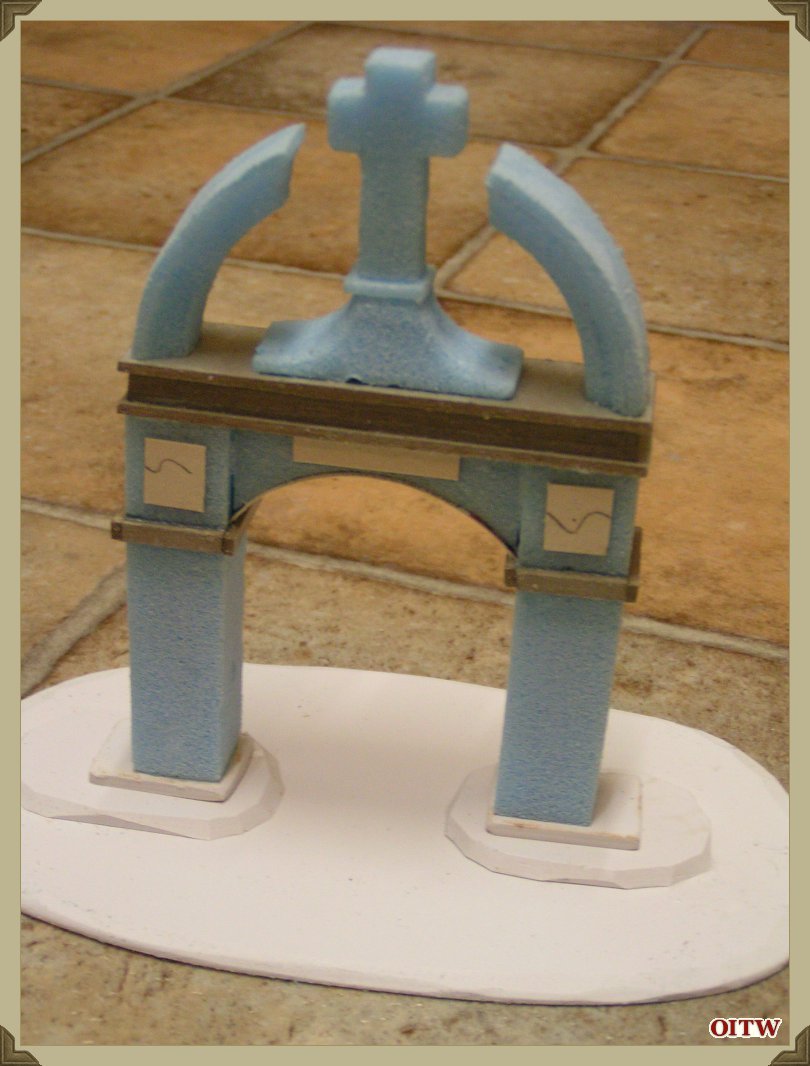
I have used my usual basing material – an elongated oval of 3mm thick plastic card as the base however you can see from this image that there are both added base footings and another raised portion of plastic card between the foot of the columns and the main base.
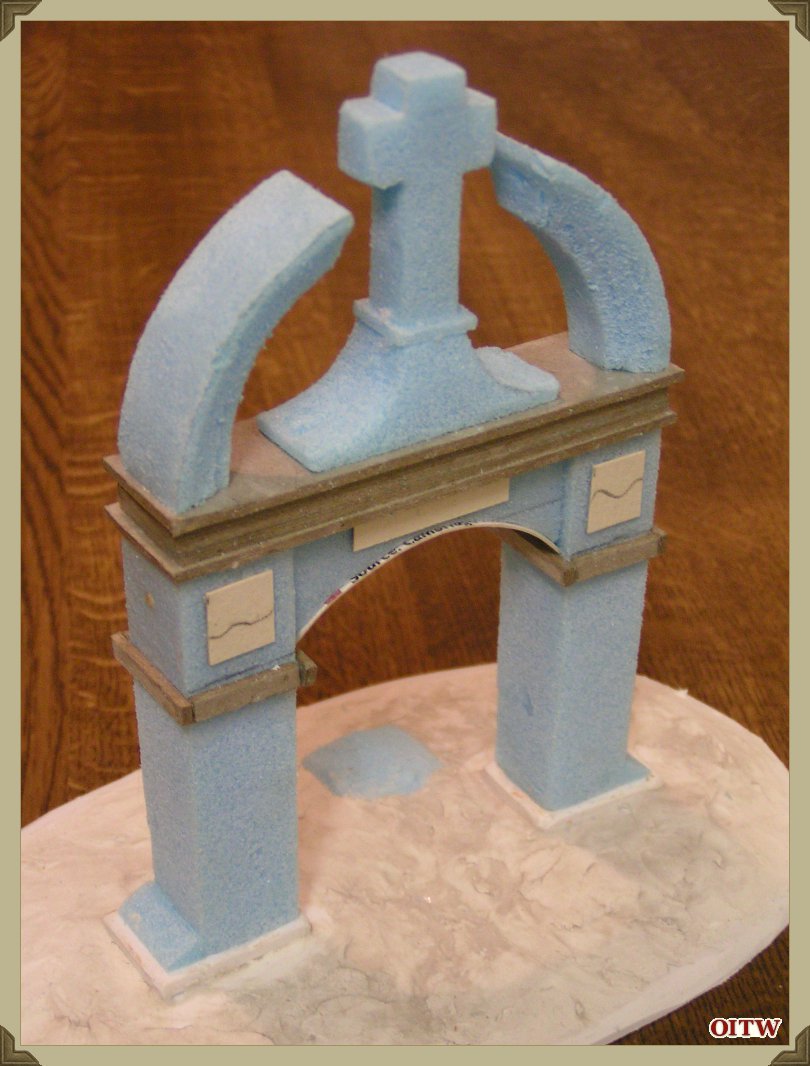
The groundwork was built-up with DAS modelling clay laid over uPVA glue.
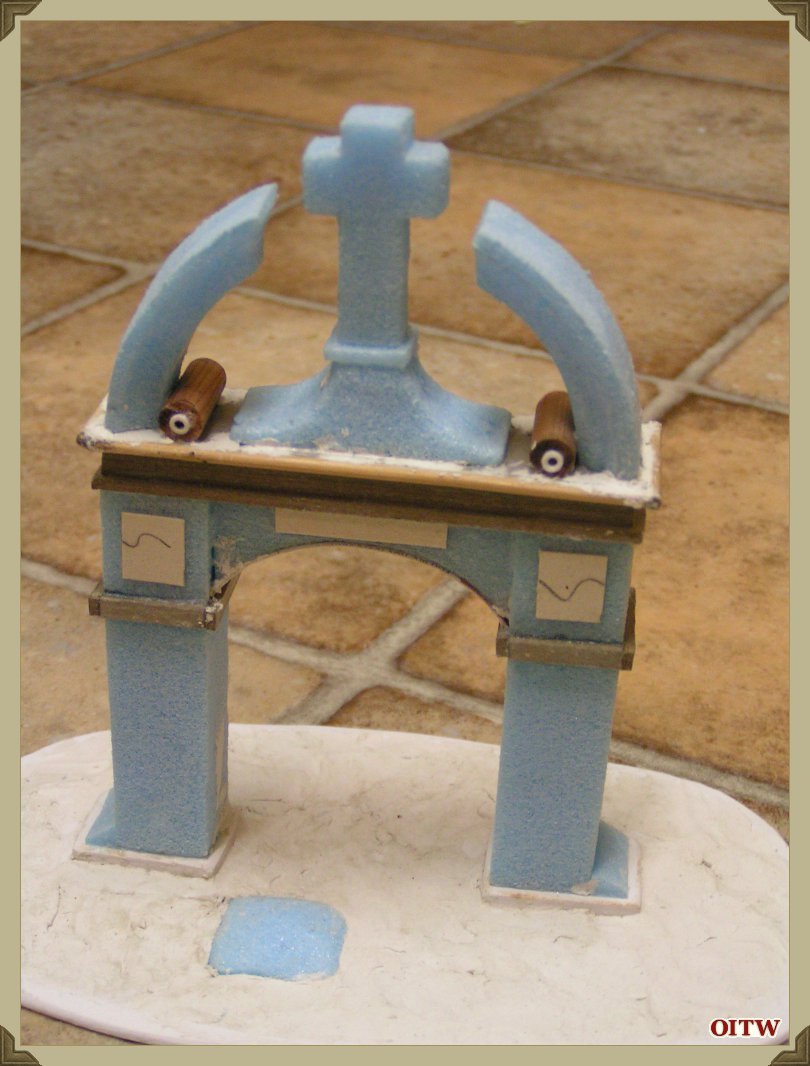
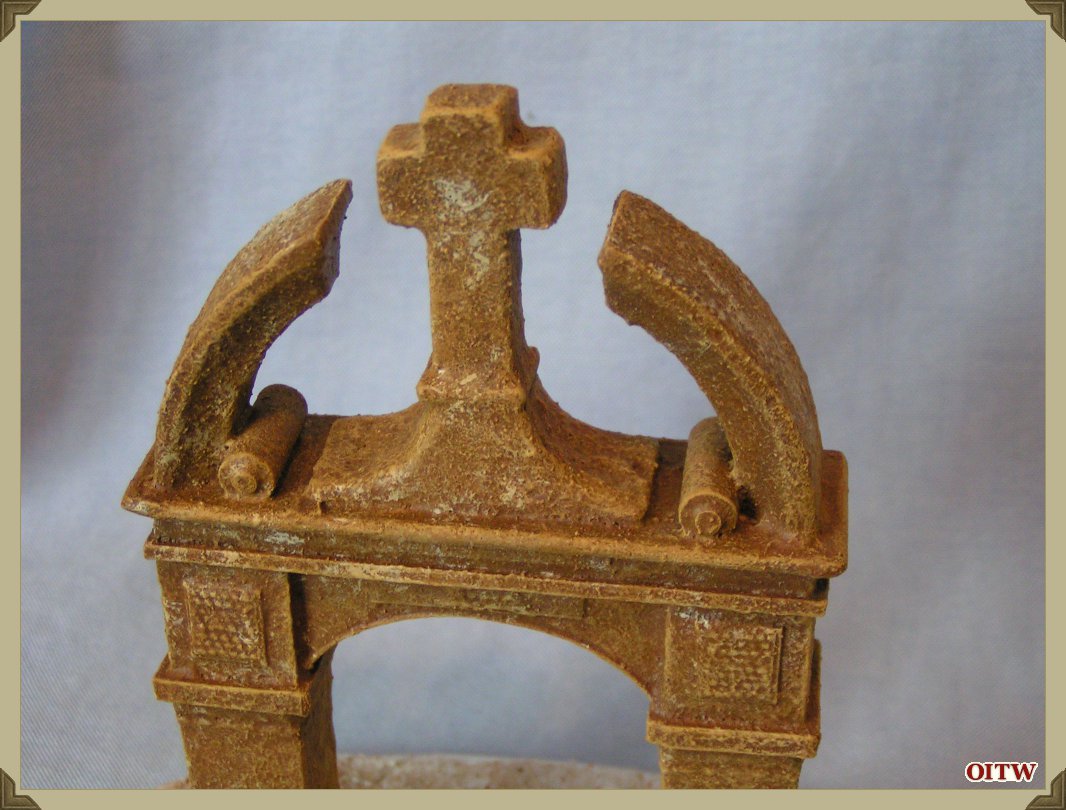
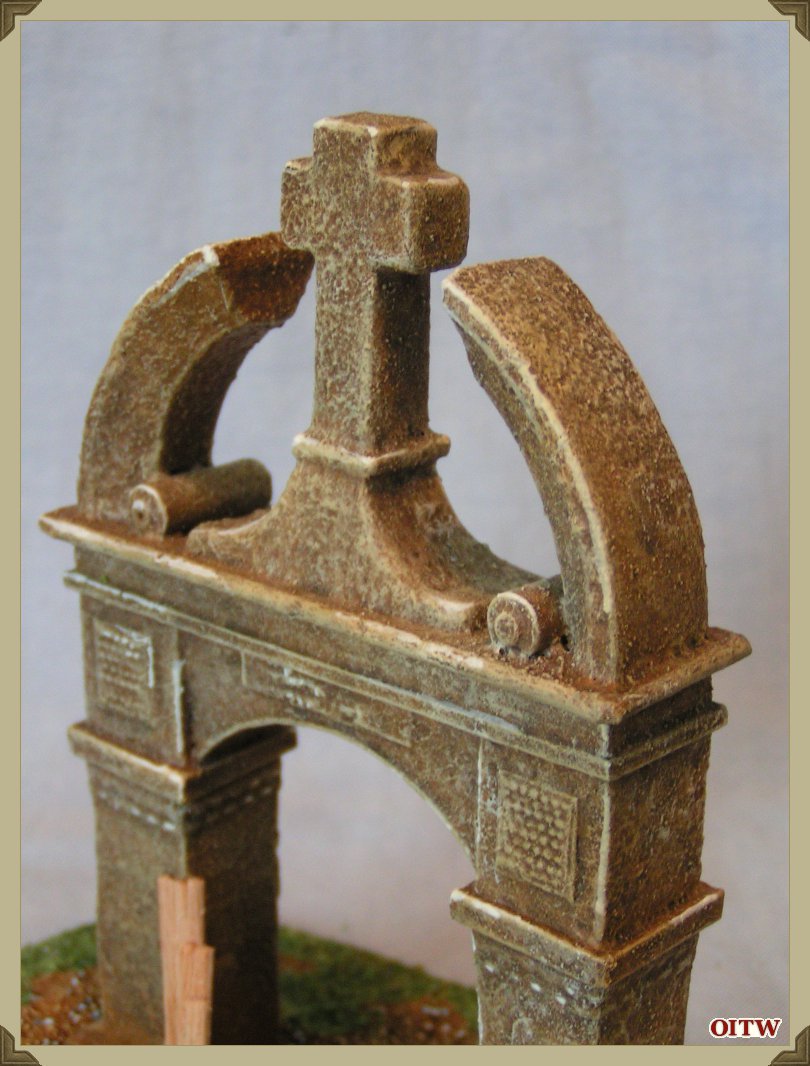
In this image you can see some of the detailing. I have added a border of Bamboo skewers to the upper portion of the gateway roof or gateway top, as I wanted this to stand proud. These were glued on with superglue and the joints filled with DAS (they will be sanded smooth later on).
The rolls at the base of the two arches are sections of pencil, trimmed to size and superglued in place. I have further detailed them with a short section of plastic tube (handles from sweet lollipops) and added some additional cardboard detailing to the central arch way.
Total build time – approximately 4 hour’s just one evening’s work.
With the main construction finished it was onto the texturing and adding surface detail. I find that painted Blue Foam looks exactly like painted Blue Foam! I wanted this piece to look more solid and have some more features.
This first thing I did was to paint the whole model with some cheap uPVA glue, this has two effects – it coats the foam ready for any additional detailing and secondly fills in some of the foam texture, making it look more like stone.
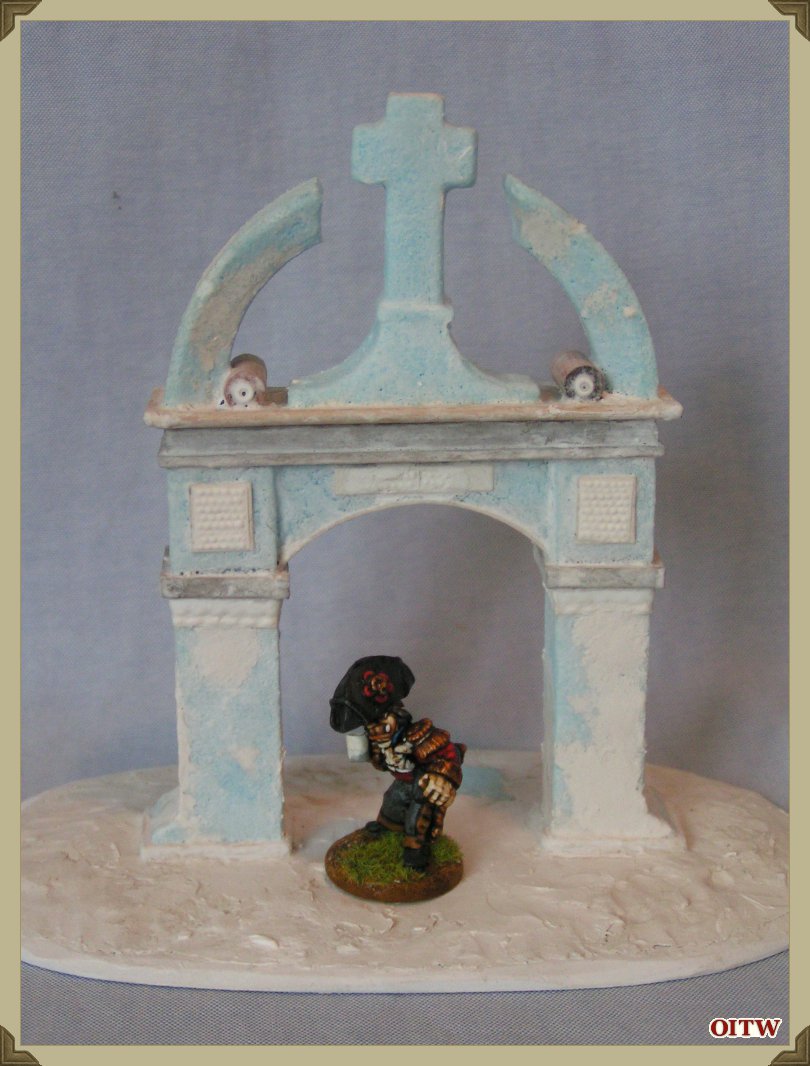
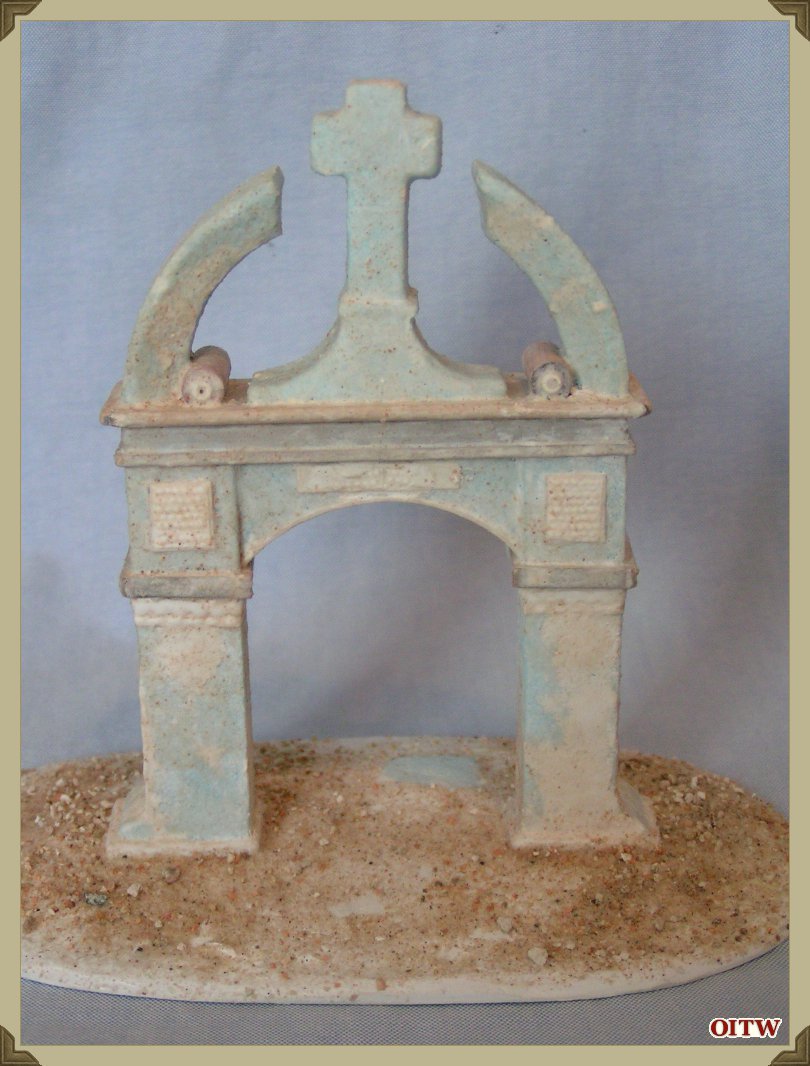
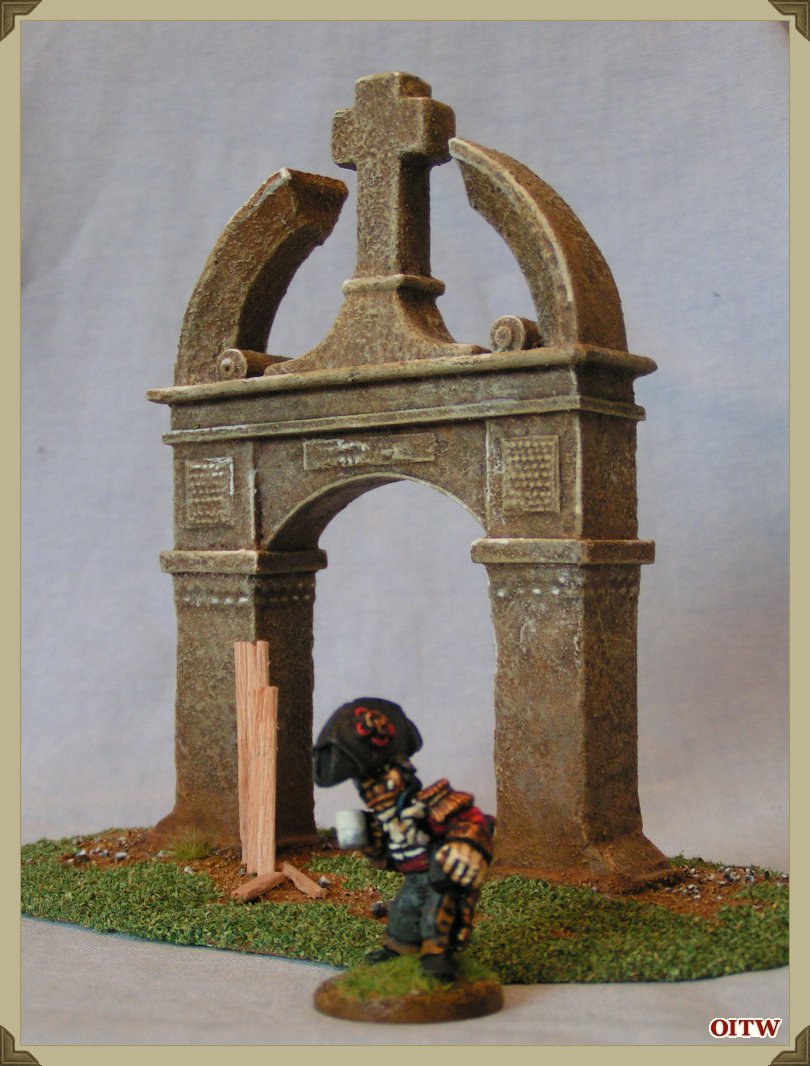
The modified Uncle Rogipoos miniature gives some idea of the scale of this piece.
Anyglypta wallpaper (the Blown Vinyl type) was added to the columns and across the arch to mimic the carved detail. This was simply cut with a scalpel and glued in place.
While DAS modelling clay was applied over uPVA glue on to the main columns. When further textured and then painted it should give the impression of solid stonework.
During this stage of construction, I had experienced some warping of the plastic card base. This is not unusual but is rare. I placed the model in an electric fan oven on low heat for 15 minutes and when warmed through and the base was flexible, I placed it onto a flat surface and pressed down. This sorted out the warp, but did leave some areas of DAS crumbling away, particularly at the edges. I trimmed away the flaking DAS and after applying some more uPVA glue as a bonding agent, I re-applied the DAS.
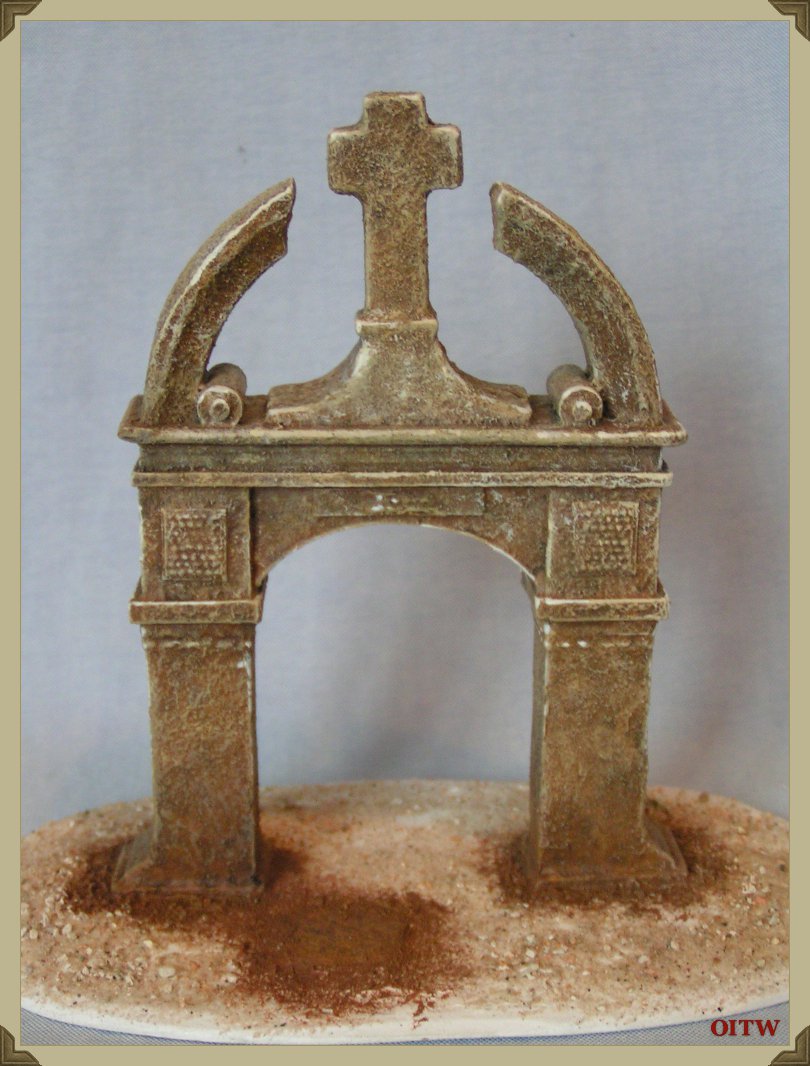
Prior to texturing the base I have given the whole structure a coat of Glue, Reeves Modelling Paste and Fine Sand. This was applied with a large (and old) brush with a stippling or prodding action.
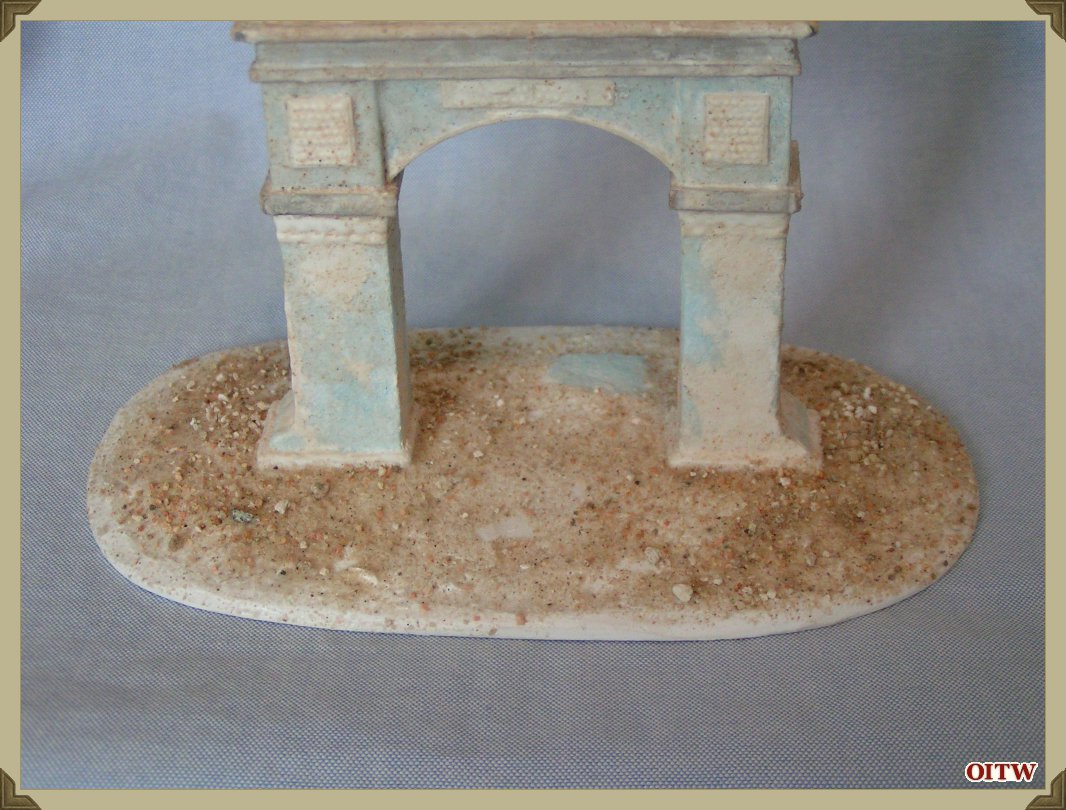
Once fully dry the additional texturing will add interest to the finished model, give some great effects when drybrushed and add strength to the foam.
Painting
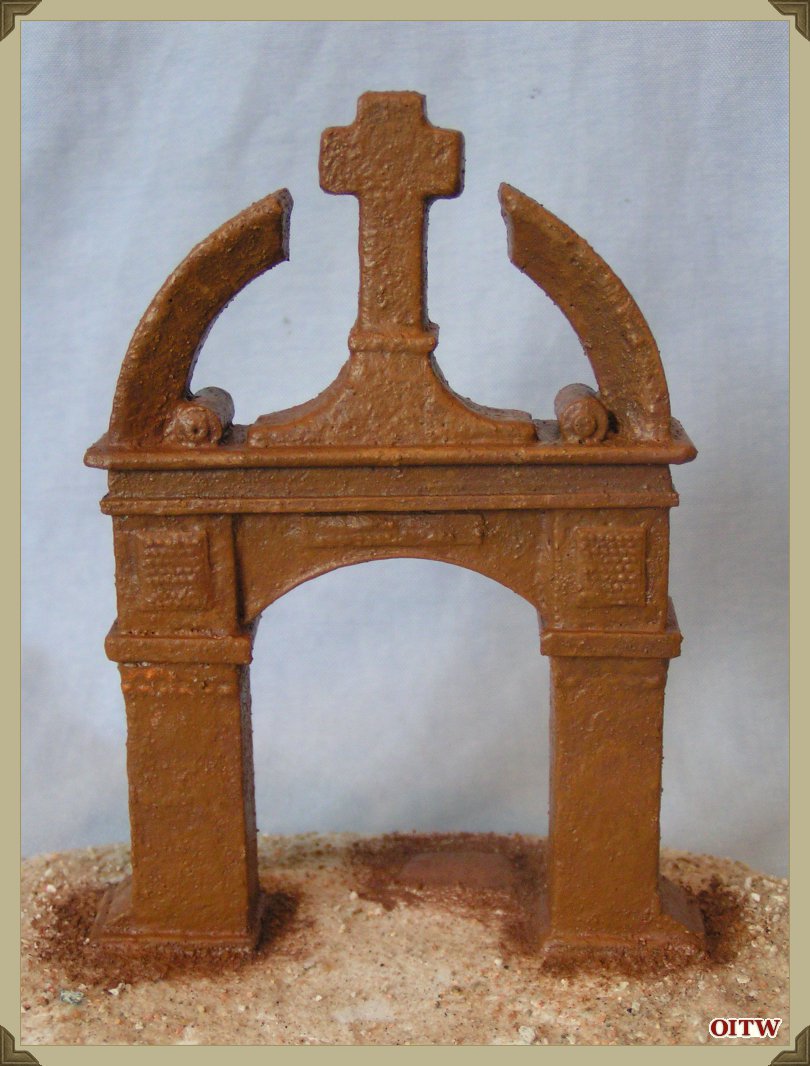
Painting commenced with an all over Brown basecoat, not much to say – I just wanted to seal the model and a Brown undercoat worked.
I daubed a couple of lighter Brown highlights on to the model. Using a large, stiff brush Leather Brown, Snakebite Leather and Skull White the layers were built up.
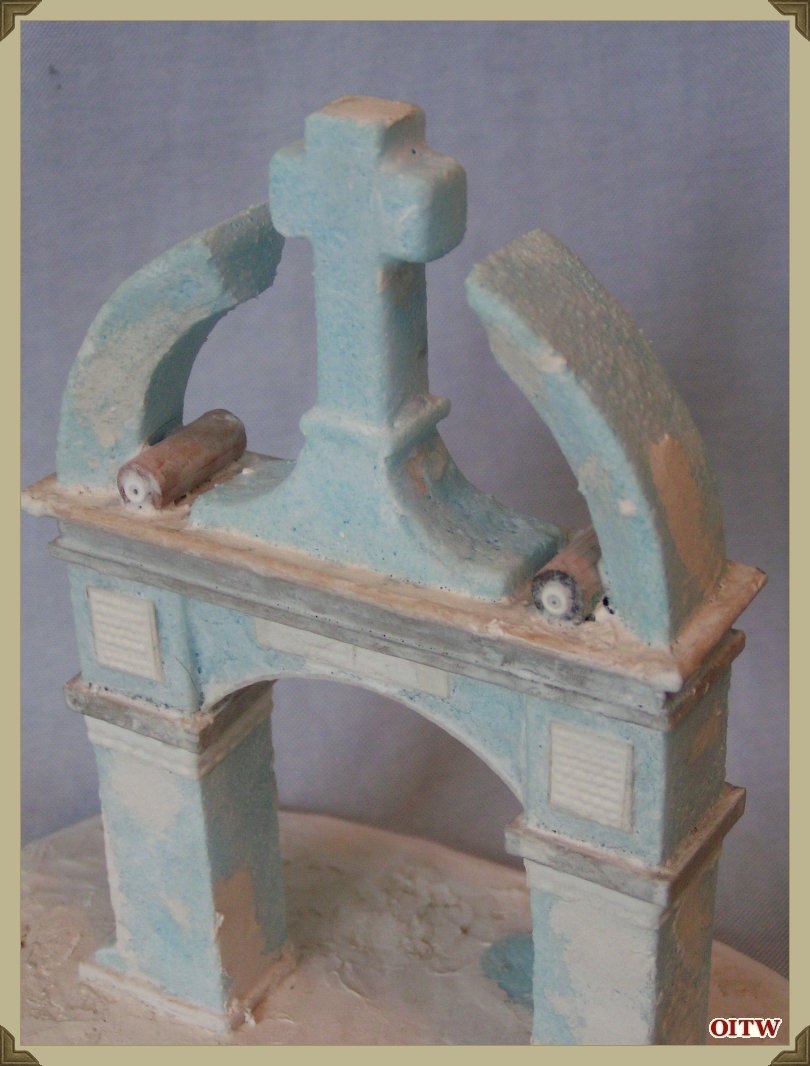
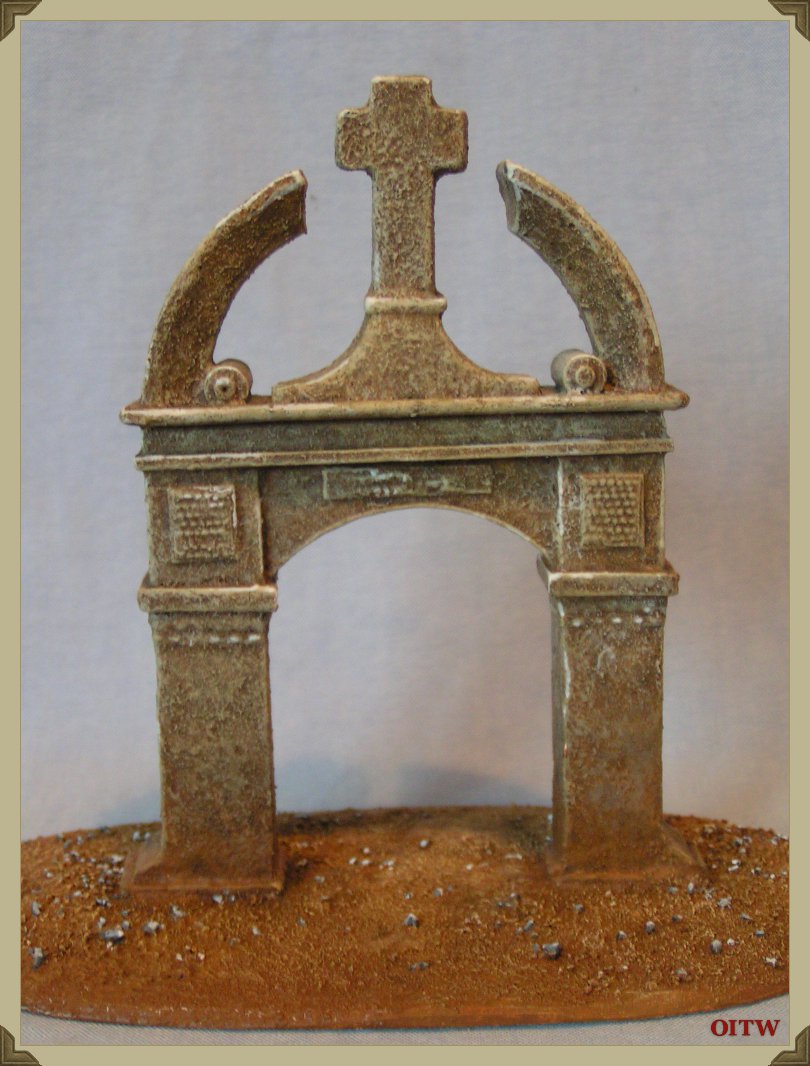
This image shows how the different layers were applied and how all that texturing work stands out after a simple drybrush.
Prior to moving on to other colours, I washed the whole model with a Devlan Mud wash.
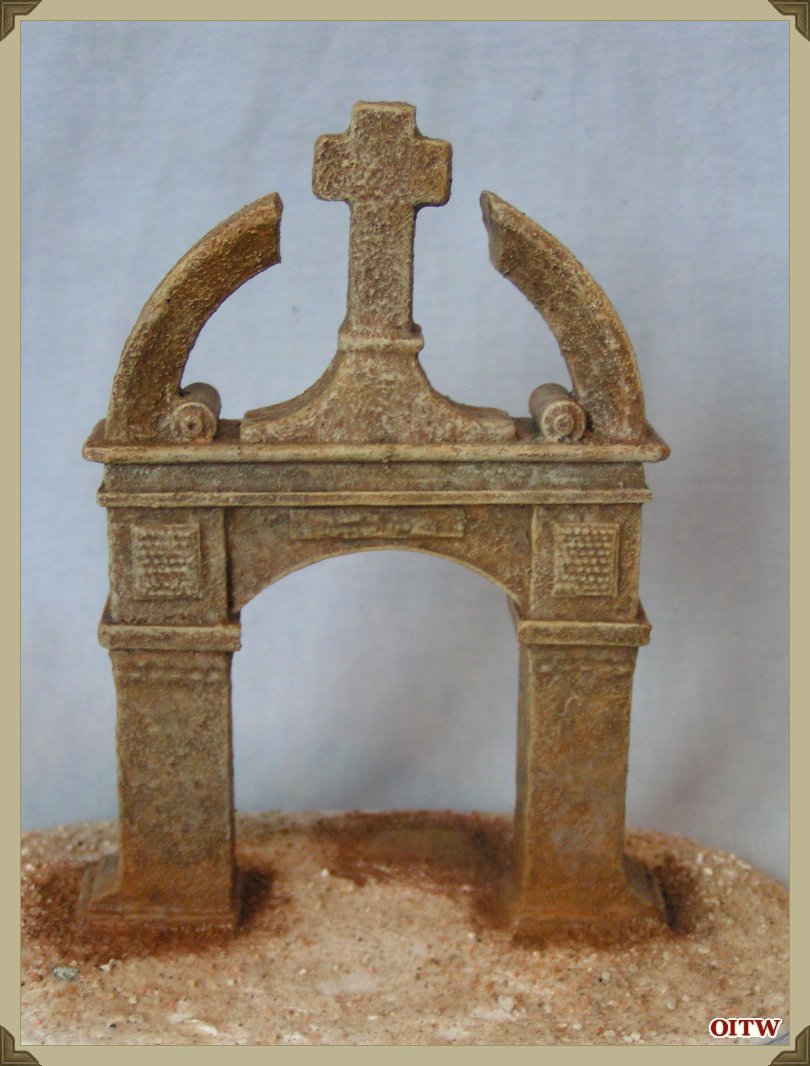
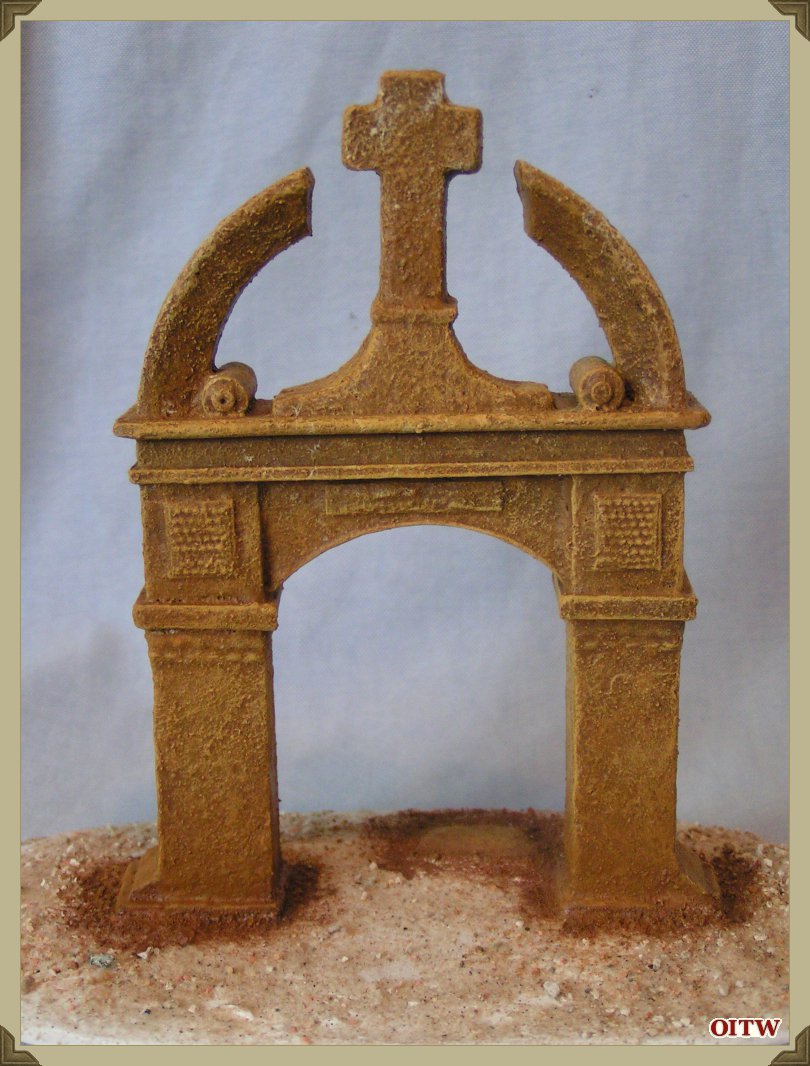
More drybrushing, the higher up you get the lighter the colour, keeping the Brown basecoat to the lower edges.
Another image showing the build-up of colour. This cannot be rushed and each layer has to fully dry before you progress.
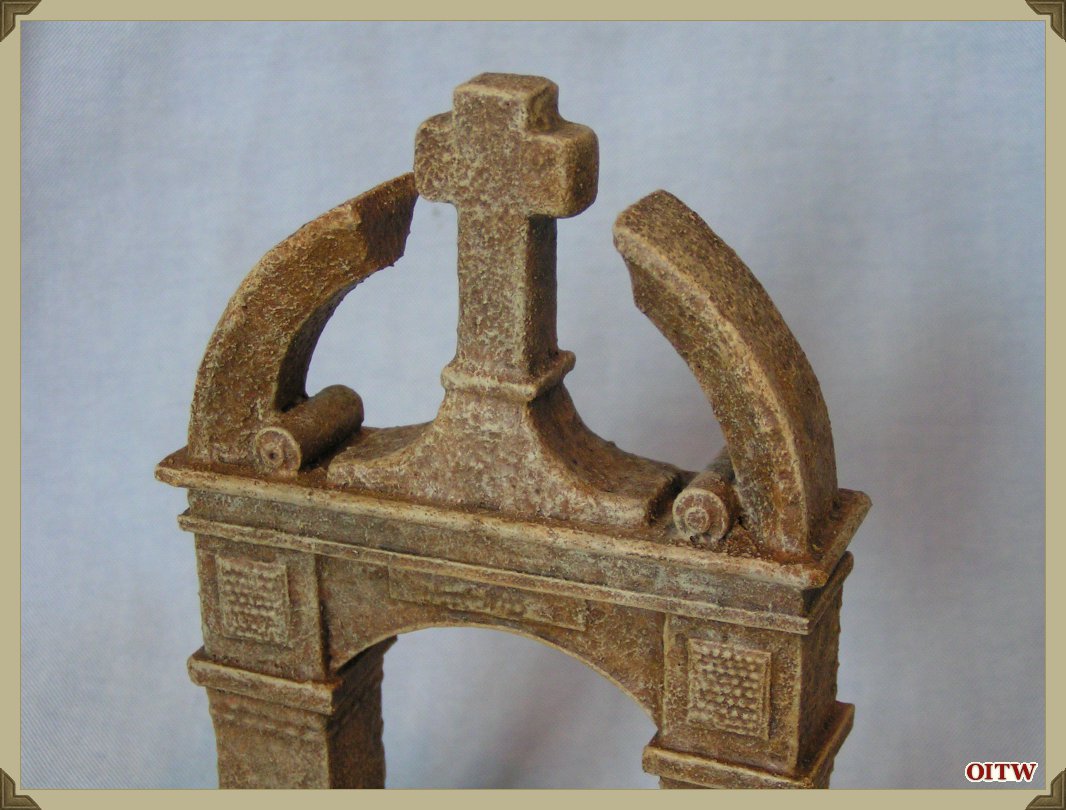
I have used a technique called ‘Extreme Highlighting’ to pick out some corners with an almost pure White highlight. This is a technique that is used by Games Workshop painters to produce extreme highlights on Space Marines. Used sparingly it can work just as well on terrain pieces.
There is no hard-and-fast rule when using this technique – just go as far as you feel comfortable.
The groundwork was painted in my usual manner, a base of Snakebite Leather with highlights of Snakebite and Skull White drybrushed in ever lighter layers. The odd stone is picked out in Grey which is mixed from Chaos Black and Skull White.
When dry I washed the groundwork, particularly around the base of the columns with some Mud wash.
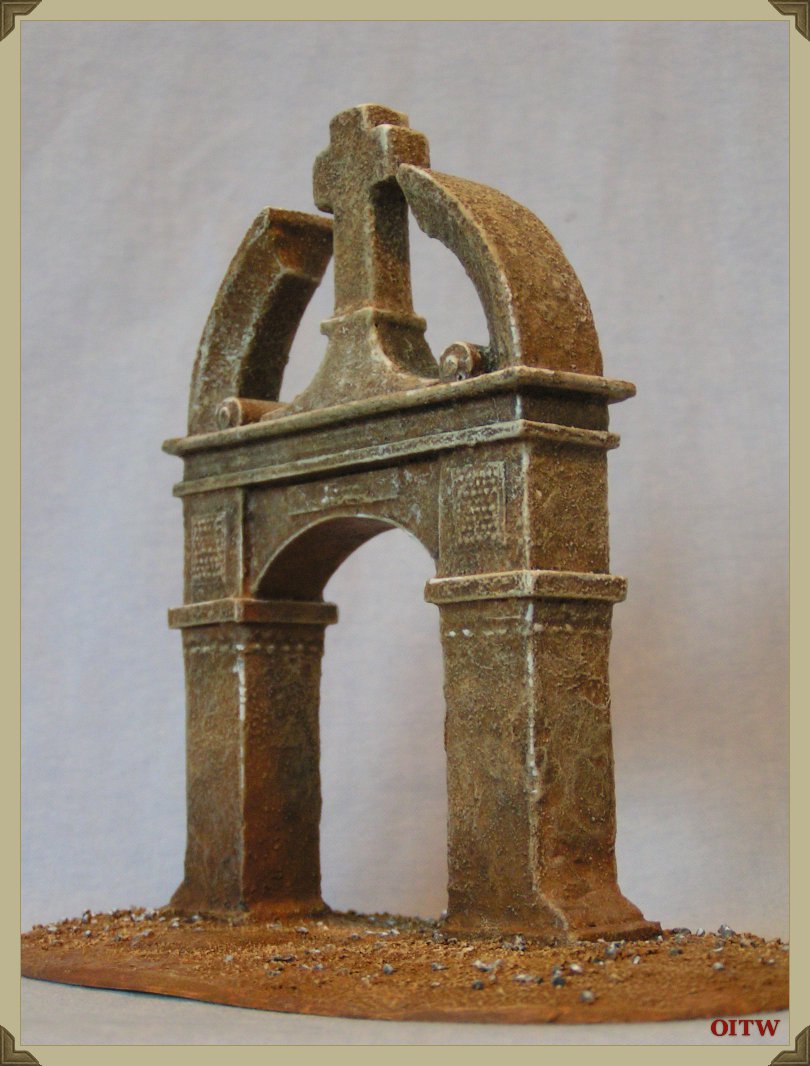
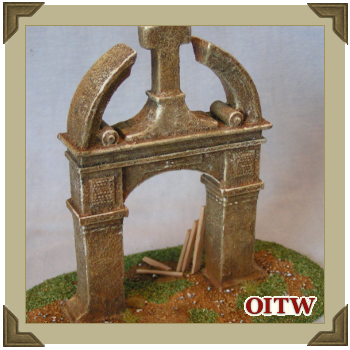
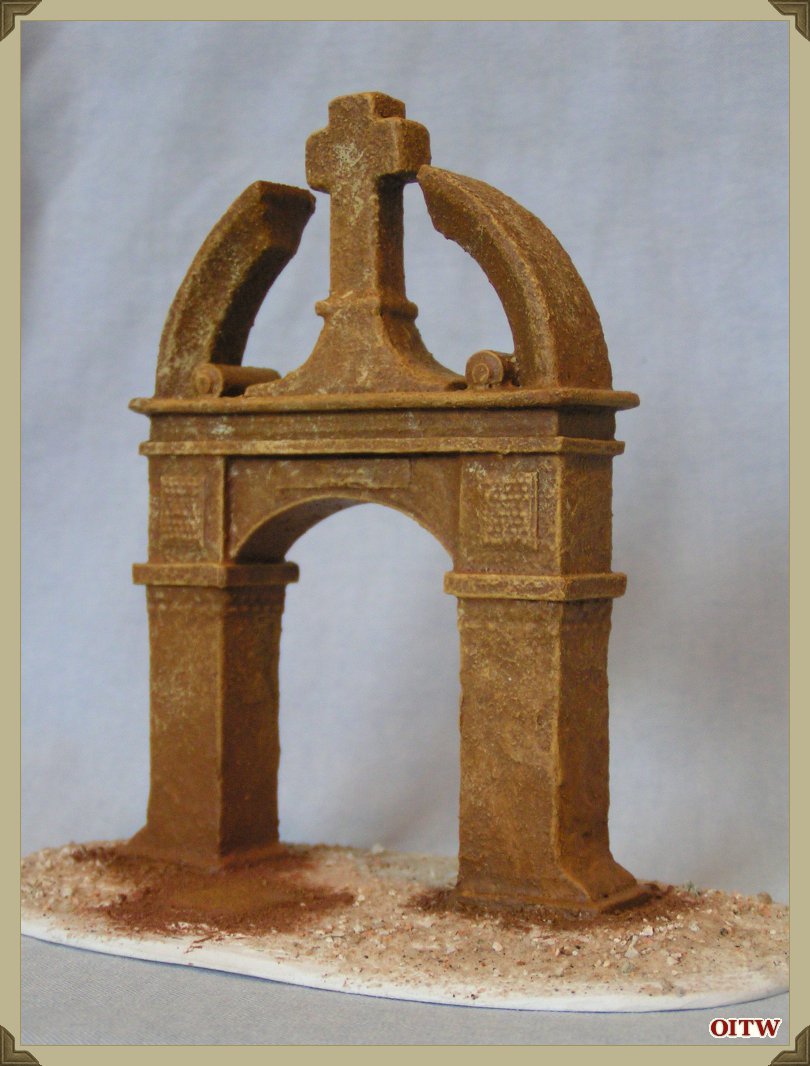
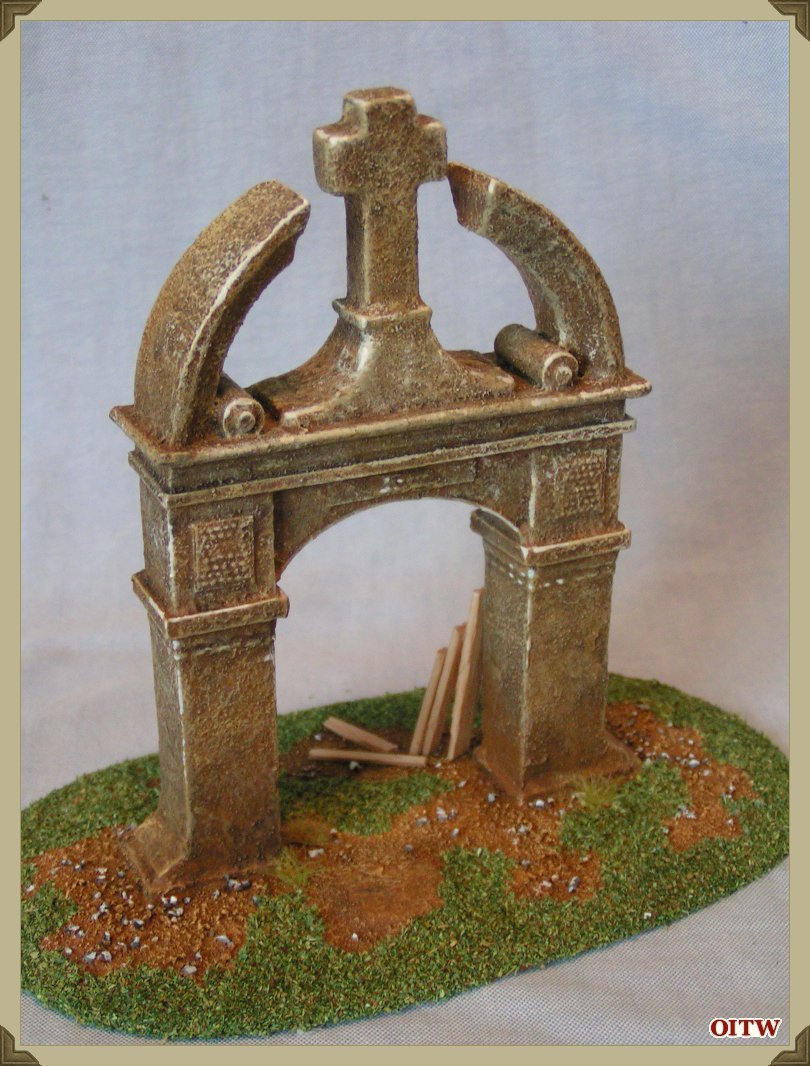
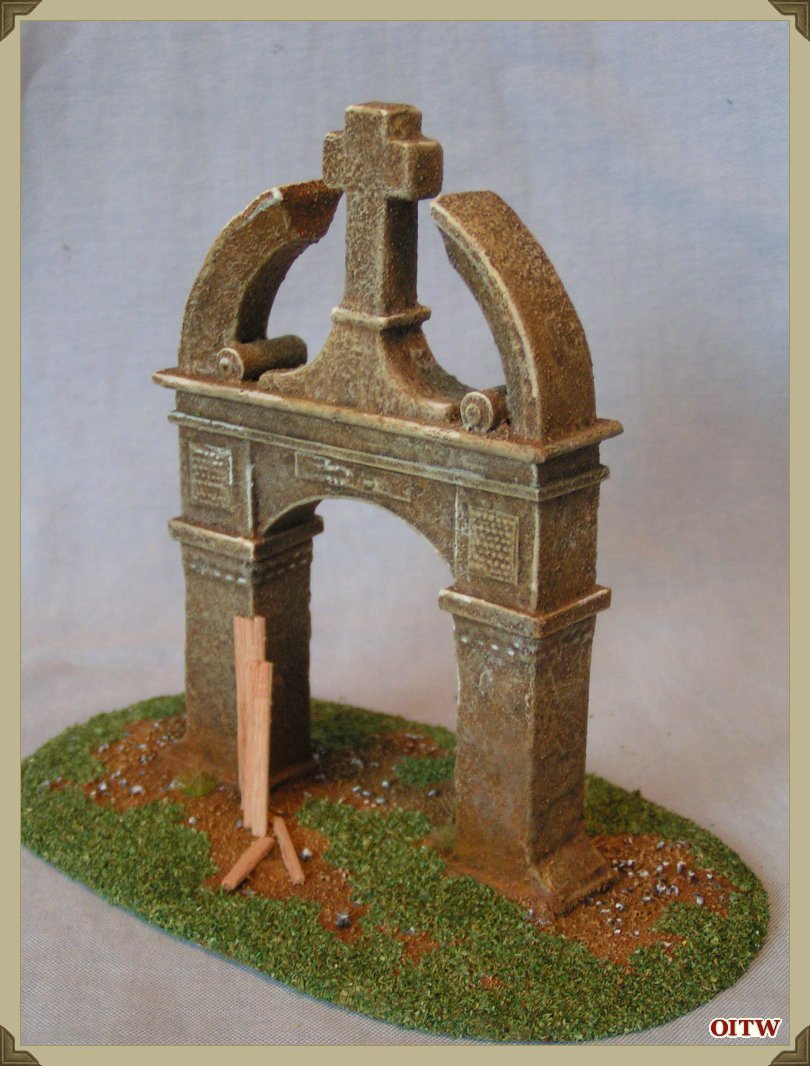
This low level image shows the Monument or Gate to full advantage.
Total painting time – another 4 hours, a day of painting, waiting for paint to dry, more painting and taking loads of images.
Finishing Off
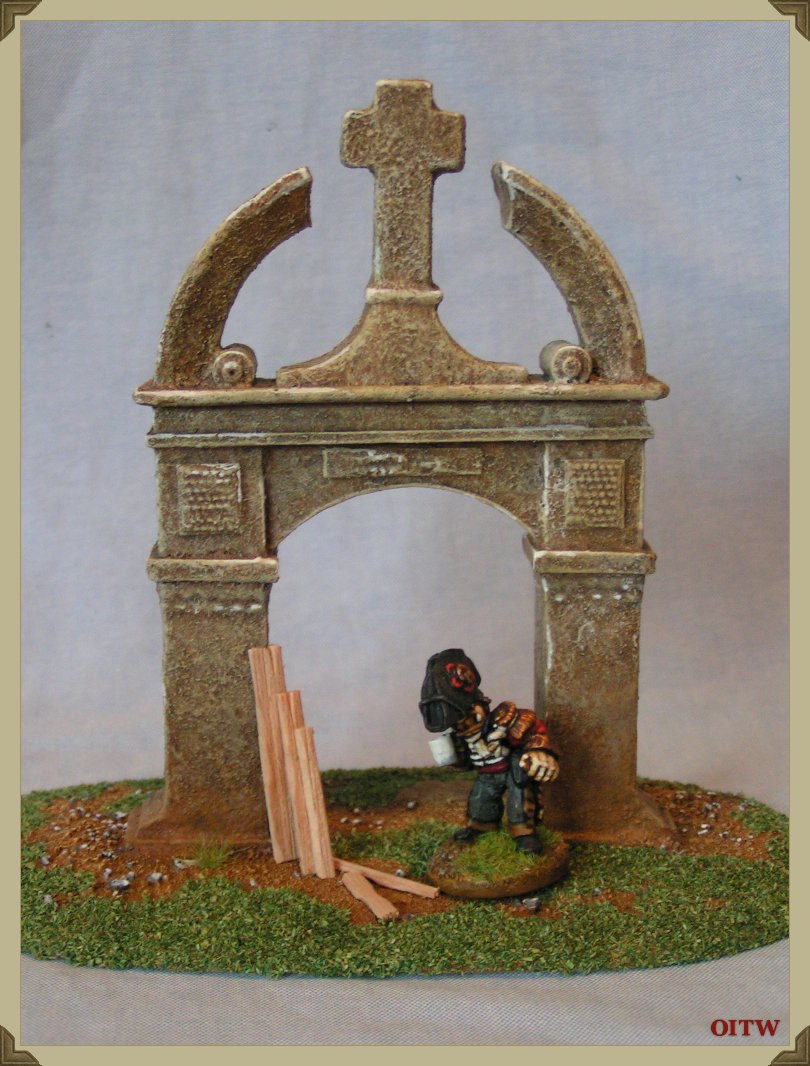
I had planned on matt varnishing this model, but completely forgot! The basing was finished with a couple of pieces of lollipop stick, cut and sanded to shape and propped up against one of the columns. I think it adds a little ‘life’ to the finished piece.
I have glued some railway scatter or dyed sawdust to the edges of the base and there are also some static grass clumps which have been superglued down.

As I stated at the beginning of this build – I am not sure what this structure is supposed to be. However I have enjoyed building what is a very imposing piece of terrain. We just need some Highland Rats to complete the picture; ‘The Joccians in Korruna’.
~
Webmaster's Notes
"Korunna Arch" is an Orcs in the Webbe original article and was first published here as part of our 2013 Advent Calendar.