![]()
"Larrey Ambulance"
A Modelling Masterclass by Tony Harwood
Master modelmaker Tony Harwood, walks us through the creation and painting of a scratch built 28mm horse drawn wooden ambulance whose historical counterpart first saw use in the 18th century.
~
Simply click on any of the photos below to open the full, higher resolution, image - Craig.
~
Introduction
On page 80 of Alternative Armies' black powder fantasy wargame, Flintloque: Death in the Snow (DITS) there are background notes and statistics for two special additions to your Flintloque sections. The first details The Gravinski Re-Animator; a gruesome machine that creates new Undead from the broken bodies of fallen mortal soldiers which is creatively reproduced as (55507) from Alternative Armies. The second gives similar information for the Elf Field Hospital (51503), however with the release of DITS, and comments on the Notables Yahoo group, I felt that a Larrey Ambulance model was needed. What follows is short article explaining how I went about building and painting a ‘scratch-built’ Larrey.
Firstly some notes on Dominique Jean Larrey and his Flying Ambulance. Larrey was the surgeon-in-chief of Napoleons French army between 1797 and 1815, during this time he initiated the modern method of army surgery - field hospitals - and oversaw the birth of the army ambulance corps.
Larrey adapted the agile carriages of the French Flying Artillery to carry wounded across the battlefield, training their crews of drivers, corpsmen and litter bearers to offer triage to war casualties, treating the wounded according to the seriousness of their injuries and need for medical care regardless of rank or nationality, allied soldiers or enemy.
I started with a Google image search and choose an illustration of the plastic Larrey ambulance produced by HaT. (They produce two such box sets, one is the two wheeled light ambulance - HaT 8103 French Light Ambulance and the second is a four wheeled wagon - HaT 8104 French Heavy Ambulance). I choose the two wheeled version, and taking the wounded figure from the Elf Field Hospital miniature set (the one on a stretcher), I sketched out a rough draft of a generic Larrey Ambulance.
Construction
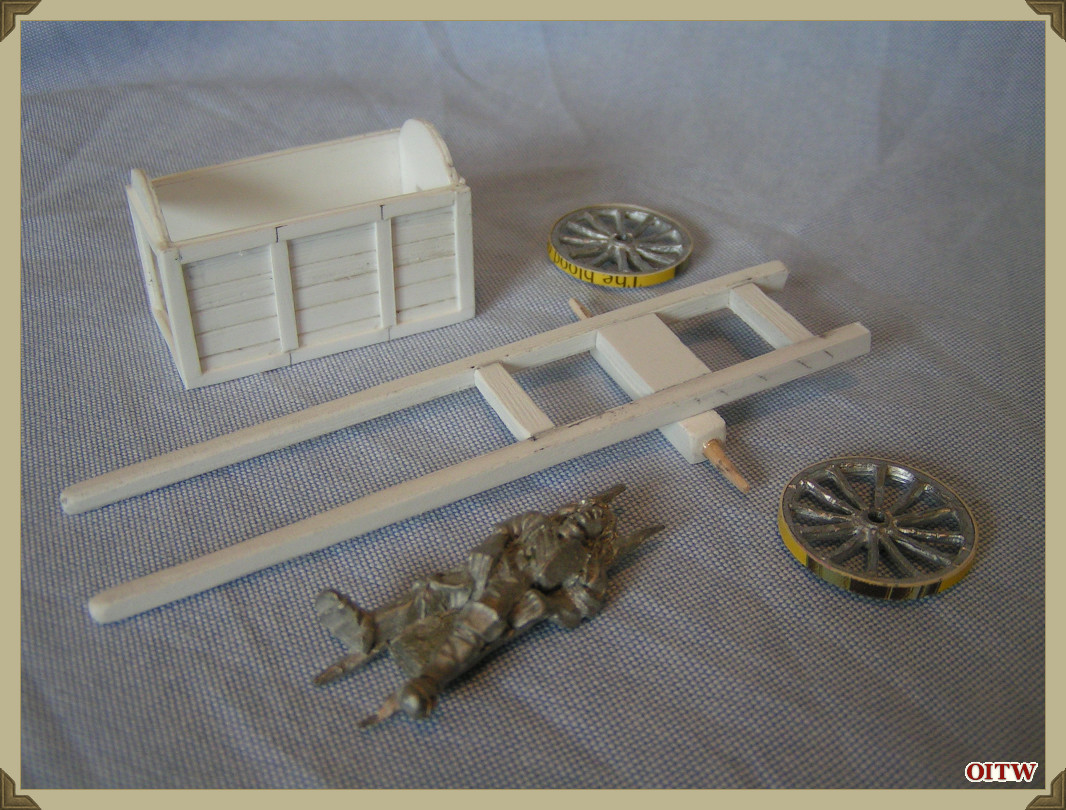
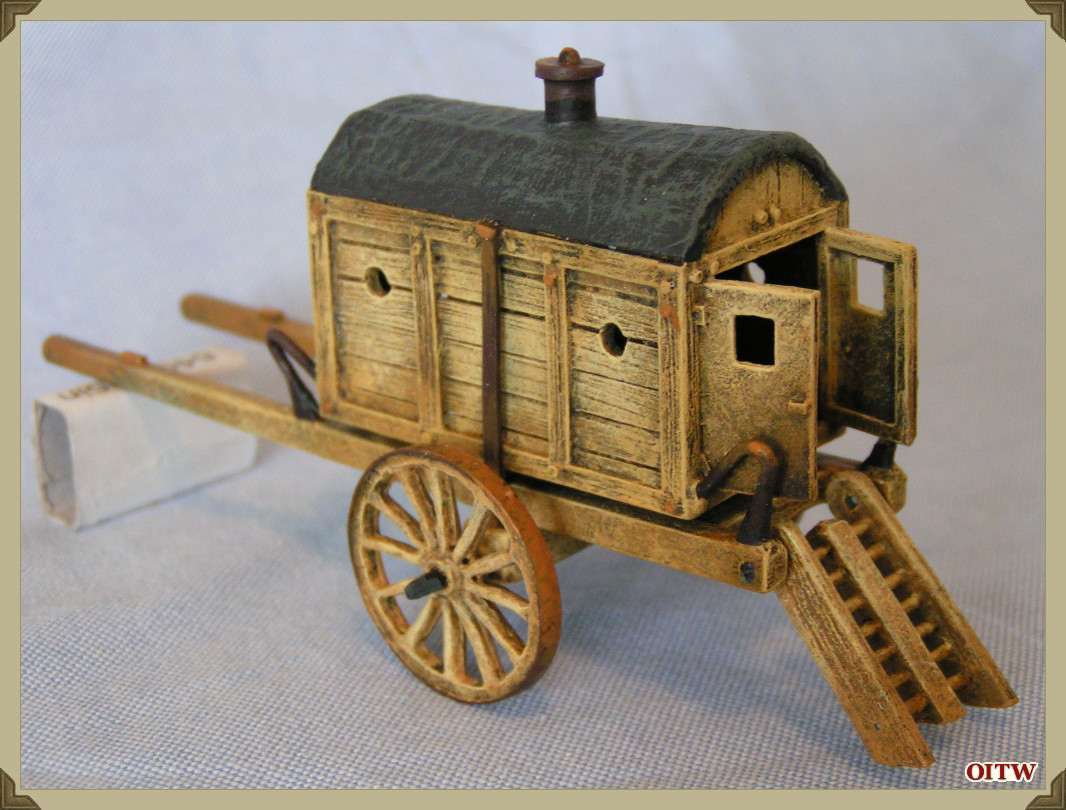
My first project was to produce a box from (30thou) or 1mm Plastic card, large enough for the wounded Elf to lie in and scaled from my sketches. This was a simple affair, a base, two sides and an end. The second end piece was modelled open and only needed a curved roof section above the doorway. I used styrene cement to glue these pieces together.
From the photo, you can see that this simple box was ‘clad’ with another layer of 1mm plastic card, this one scored into planks with a plastic cutter (available from Tamiya) and textured with a razorsaw to imitate wooden sides. Once again I used styrene cement.
On top of this planking I attached a third layer – this one just for the bracing. The photos shows the process better than words. Of note is the fact that when complete the three layers give the impression of a wooden sided carriage. This is a technique I learnt from a railway modeller, it is the same technique used to build railway goods wagons. Although time consuming, the process is very simple and can be used in many different modelling projects.
The shafts and frame of the wagon are made from textured, 3mm thick plastic card, but could just as easily have been constructed from wood or layers of 1mm plastic card. The axle is again thick plastic card with cut-down cocktail sticks for the metal hubs to fit on to.
The metal wheels are from my ‘bits box’, but I think they were in turn from one of the Alternative Armies/Flintloque Dwarf cannons?
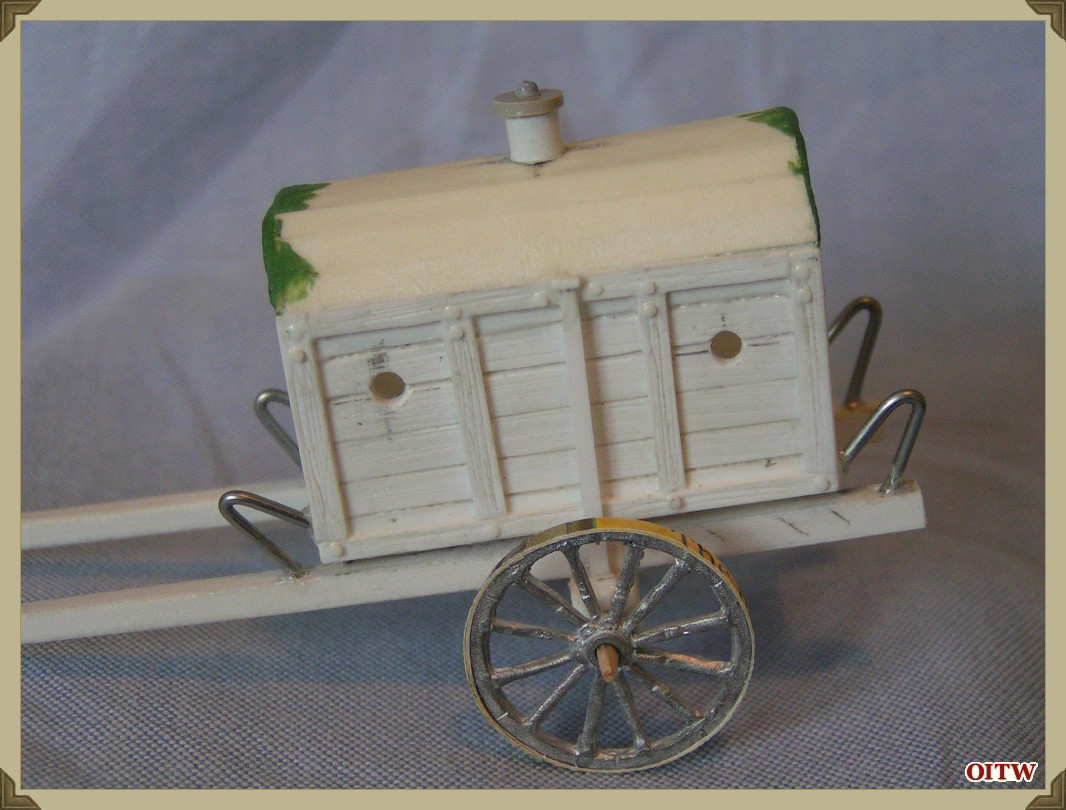
The roof was made from thin strips of 1mm plastic card, glued from front to back following the curved roof profile. When dry, a second layer was glued on to the first and when this was dry, a strip of masking tape was stuck to the top. For this I used superglue and later built up the ends with a small amount of Green-Stuff.
The vent on the roof top appears in some illustrations and is a section of plastic knitting needle with some scrap plastic rod for detailing.
A Larrey Ambulance wooden body is usually supported on sprung straps attached to the frame and to show this I used small sections of bent paperclips, superglued to the body and the frame. This was without doubt the fiddliest part of building the model. I used superglue in small quantities and glued each corner one by one. To add strength – there is a small section of plastic card mounted under the main body and stuck with superglue to the frame or carriage.
In this photo – you can also see that I have drilled four round windows to the sides and carved a square window to the end. I have also attached some slivers of plastic rod to the body to replicate coach bolts.
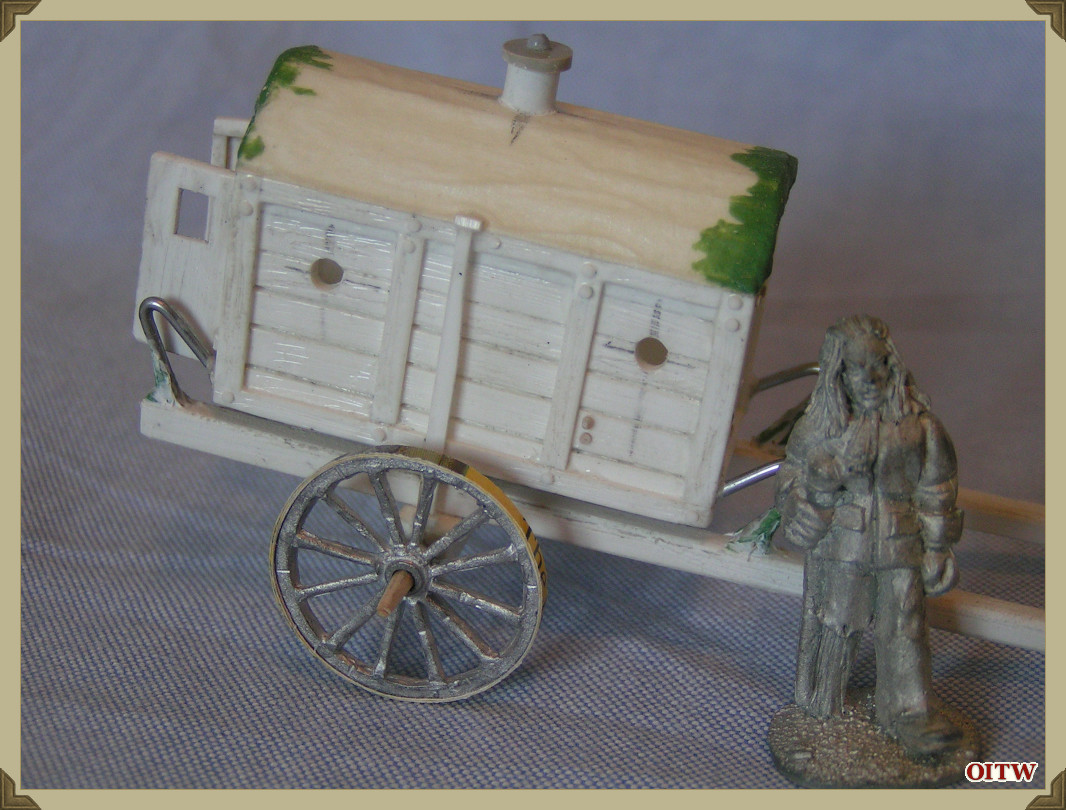
The two small doors to the rear were again layers of 1mm plastic card with windows carved with a Swan Morton scalpel.
This photo shows how the layering technique described earlier is used to mimic the construction of the Larrey’s wooden box body. In addition I have purposely allowed the masking tape roof to wrinkle, when painted this will give a great representation of a painted canvas roof. For added interest you could also add other small pieces of masking tape to show make-do repairs or patches.
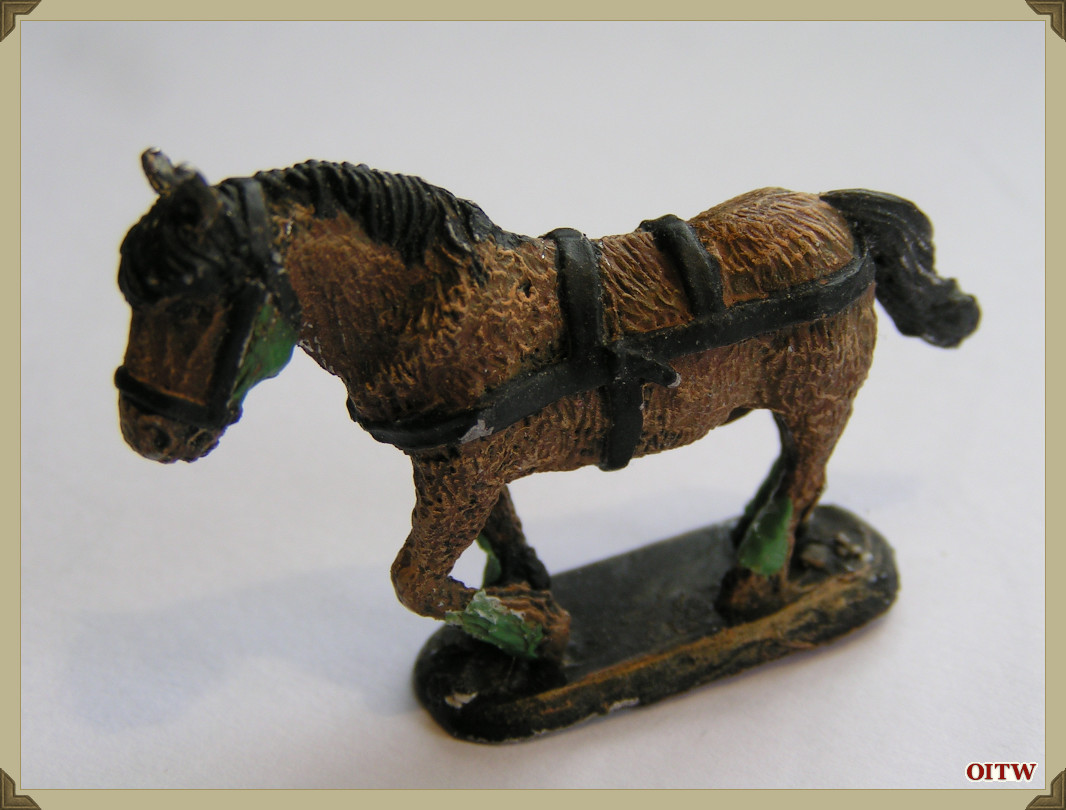
I choose a small pony/horse to be the draft animal, mainly because I felt it would work well, but also as I felt the AA French horse sculpt was too animated for a model such as this. The miniature was dredged-up from my spares-box and suitably ‘Flintloque-ified’ with a deeper cheeks and hairier legs. I used ‘green stuff to add the details and also re-model the harness details.
The smaller pony/horse meant that the shafts of the wagon were cut down slightly and the ends sanded smooth. I am not sure of the history of this particular horse model, but would suspect it is an Essex Miniatures figure.
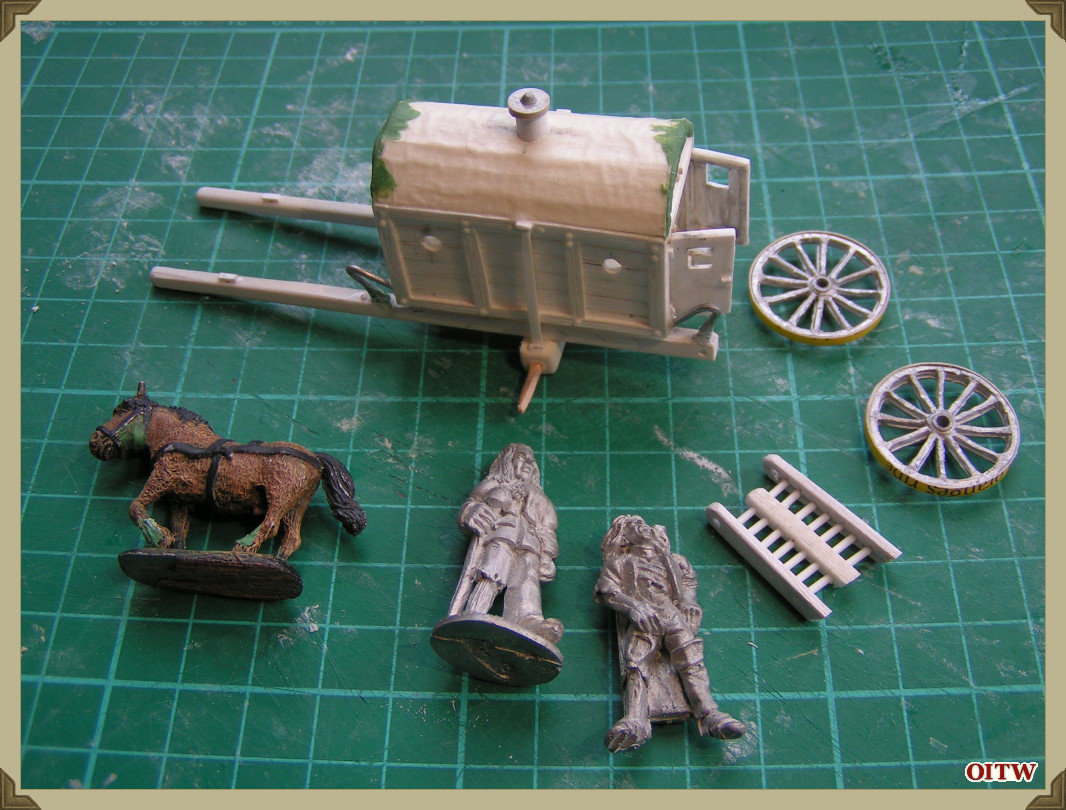
These two illustration shows the separate pieces finished and laid out.
Painting
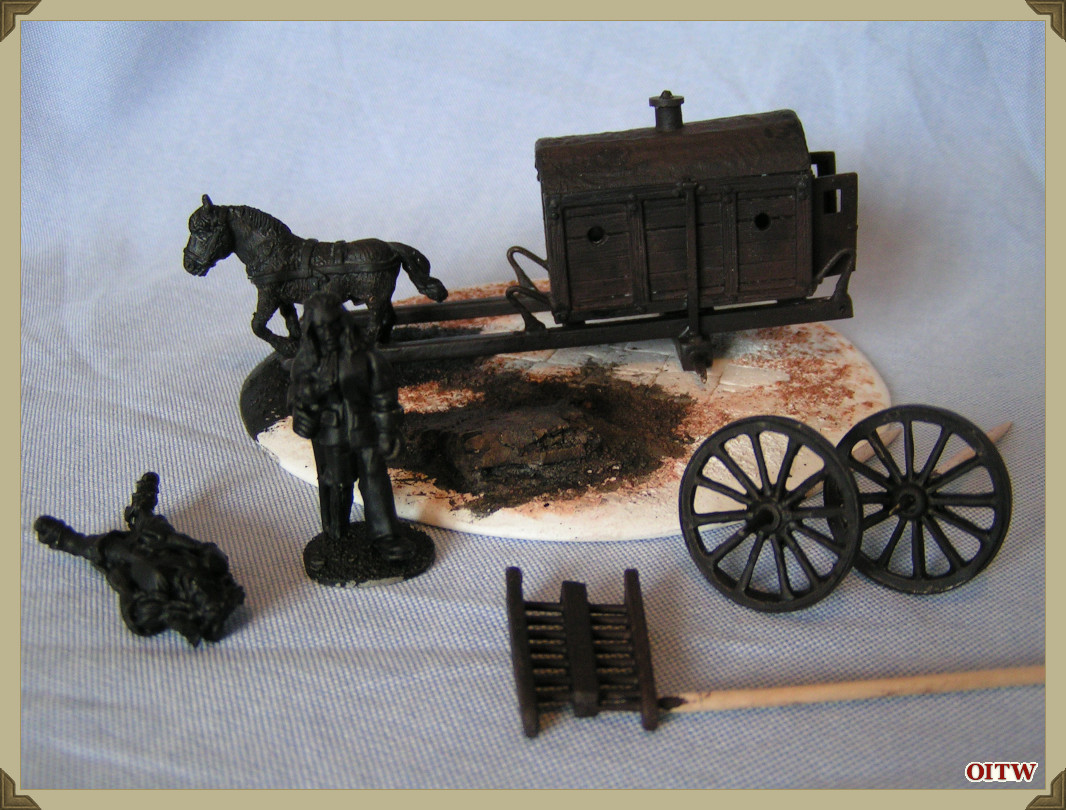
I started with a Dark Brown and Black mix. I was not overly concerned about being neat and tidy as this first coat was really just a base colour. I made sure that the entire ambulance interior was painted in this colour as I did not want any white plastic card showing through.
This photo also shows the small diorama base, constructed out of 3mm plastic card, a couple of pieces of broken cork and DAS modelling clay.
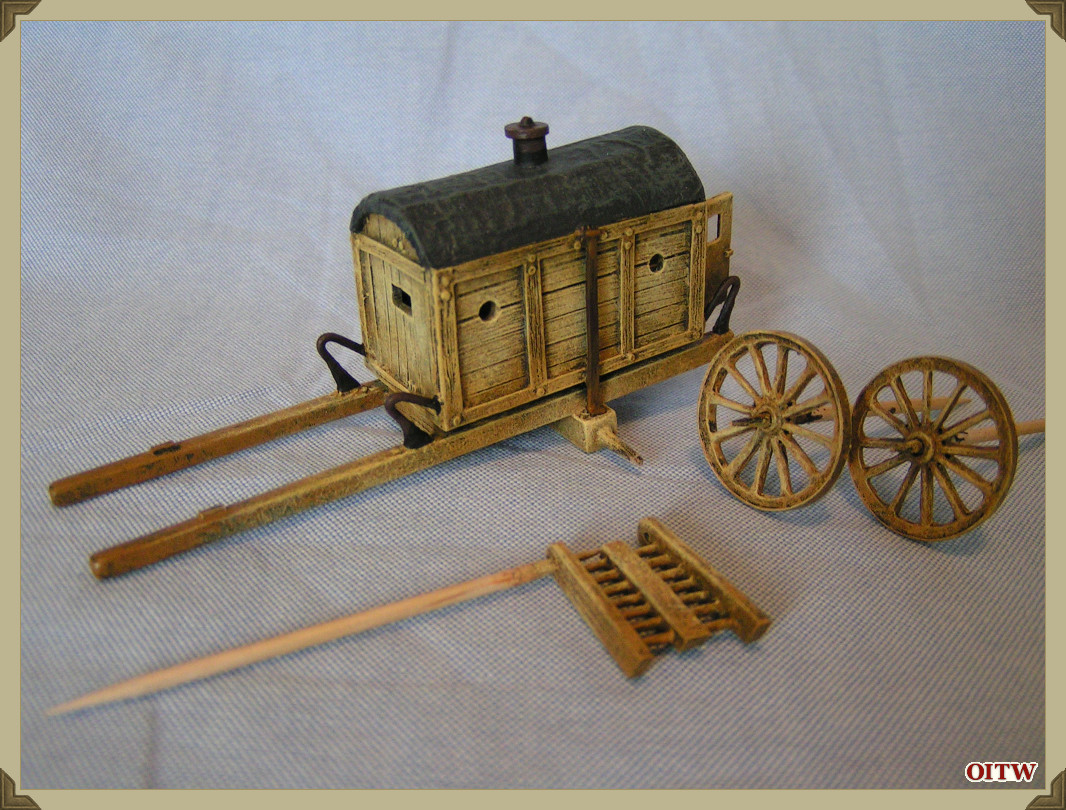
For the ambulance I wetcoated the main box body with GW Bestial Brown – this is a bit like drybrushing but with more paint on the brush. The technique should allow the darker base coat to show through in the shadows, while covering most of the model in the Brown colour.
In illustrations I have seen Larrey Ambulances in many different finishes, both painted (for example green) and bare wood, either light or dark wood. One of my favourite illustrations shows the body in a cream or fresh wood colour, a bit like Pine. This was the finish I was trying for and mixed some GW Snakebite Leather with a GW Golden Yellow for a true drybrush. Subsequently I drybrushed lighter and lighter colours with the final drybrushing being pure White brushed on the very corners of the wooden box.
The roof was painted Dark Grey with Grey and Brown drybrushing and detail painting being dark Brown and Brown for highlighting.
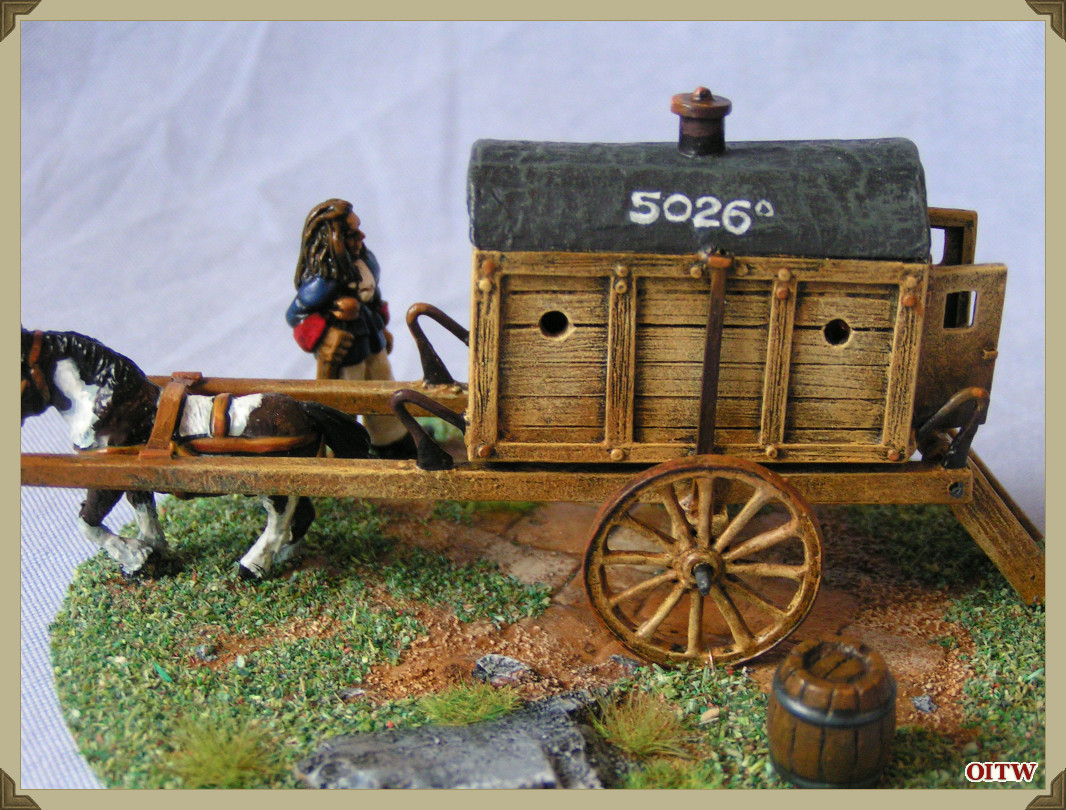
I have now attached the wheels to the main body and painted the exposed sections of the axles Dark Grey. In addition I have attached the rear ladder (at one stage I was planning on having this feature movable! I have now seen sense and superglued them in the down position).
To add some interest I have picked out a number of features with a Rust colour, mixed from Snakebite Leather, Blood Red and Badmoon Yellow.
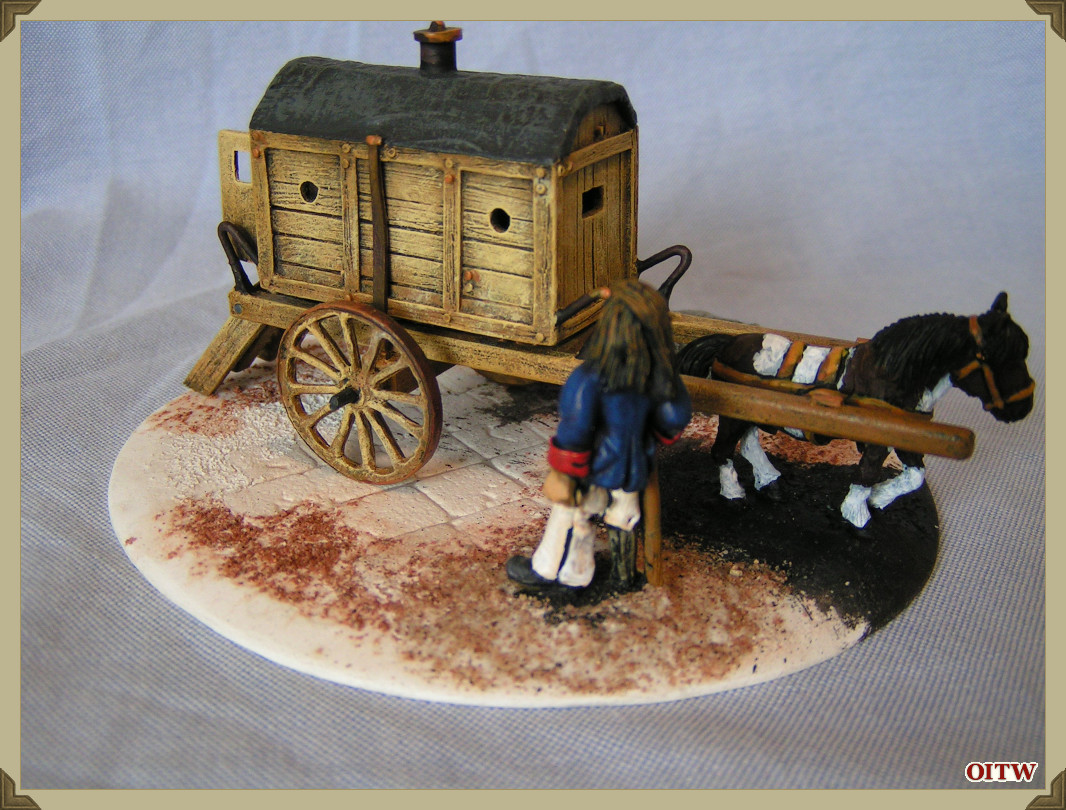
I have painted the pony a very Dark Brown, with white patches. I wanted a colourful draft animal, rather than yet another dark brown horse. The colours and pattern were taken from and Andreas Miniatures illustration. While the harnesses were painted with an Orange tint and highlight. The one-legged Ferach soldier has been painted with GW colours and is an unmodified casting from the Elf Field Hospital set.
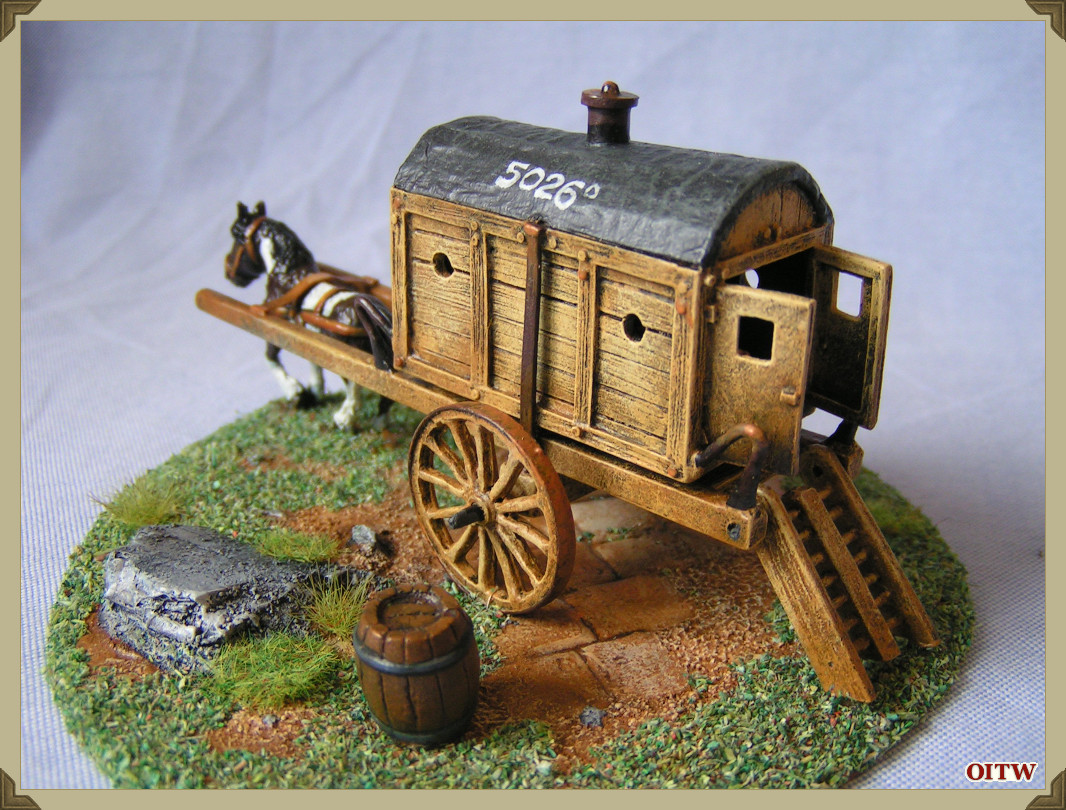
You can also see how the diorama base has been modelled and painted. One issue I am going to have is that I will have to ensure that the wagon/ambulance is (very) securely attached to the base as I can foresee that anyone wanting to pick this model up will do so by gripping the ambulance! I am planning on using superglue and thread, sewn through the base and around the wheels to make this bond strong.

I have painted the base with GW Snakebite Leather, the stone or rock was painted with Greys over a Black base and drybrushed with Grey/White.
Once the base was fully painted, I attached the Larrey Ambulance to the base with superglue, reinforcing the joins with fine fuse wire attached through the wheel and through two small holes in the base. The fuse wire was then twisted and trimmed before a small amount of superglue sealed the wire in a grove. Once the superglue was set, I sanded the base smooth and varnished the Flintloque miniatures and metal horse with Ronseal Hard Glaze varnish.
The whole model and base was then varnished with Galeria Matt Varnish. I used three coats, applied quickly as this varnish dries very quickly. I have also superglued a small barrel casting to the base before flocking the base with died sawdust and small clumps of static grass.
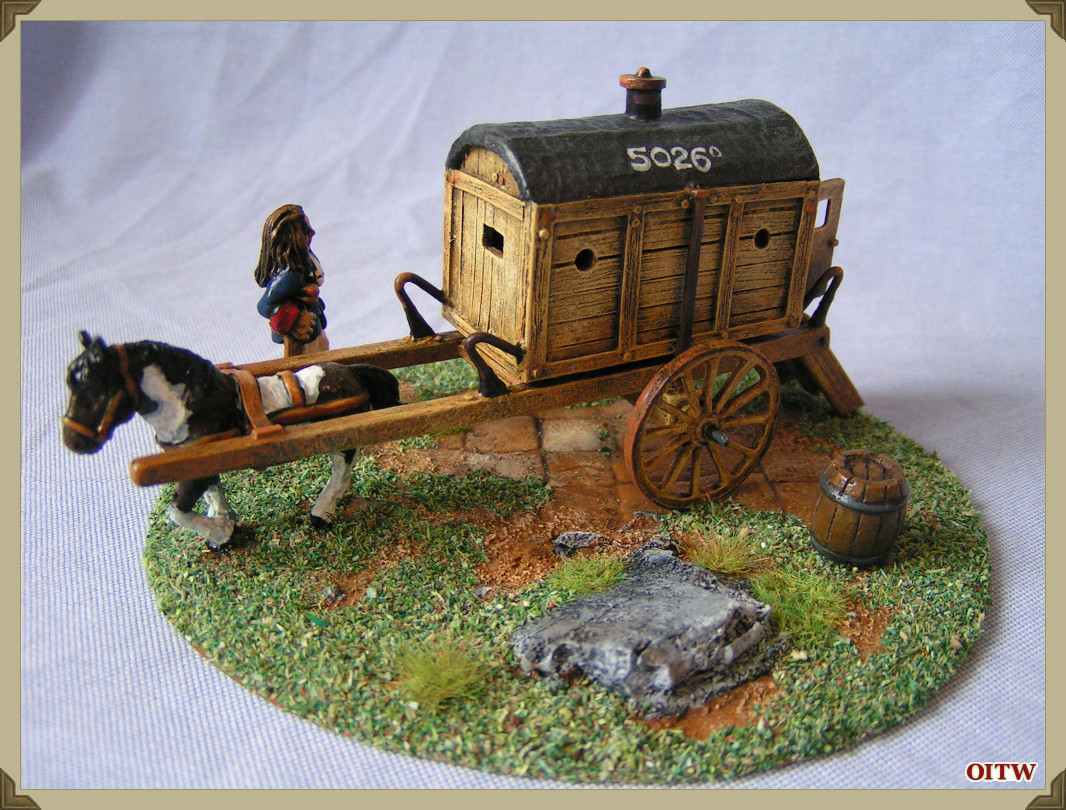
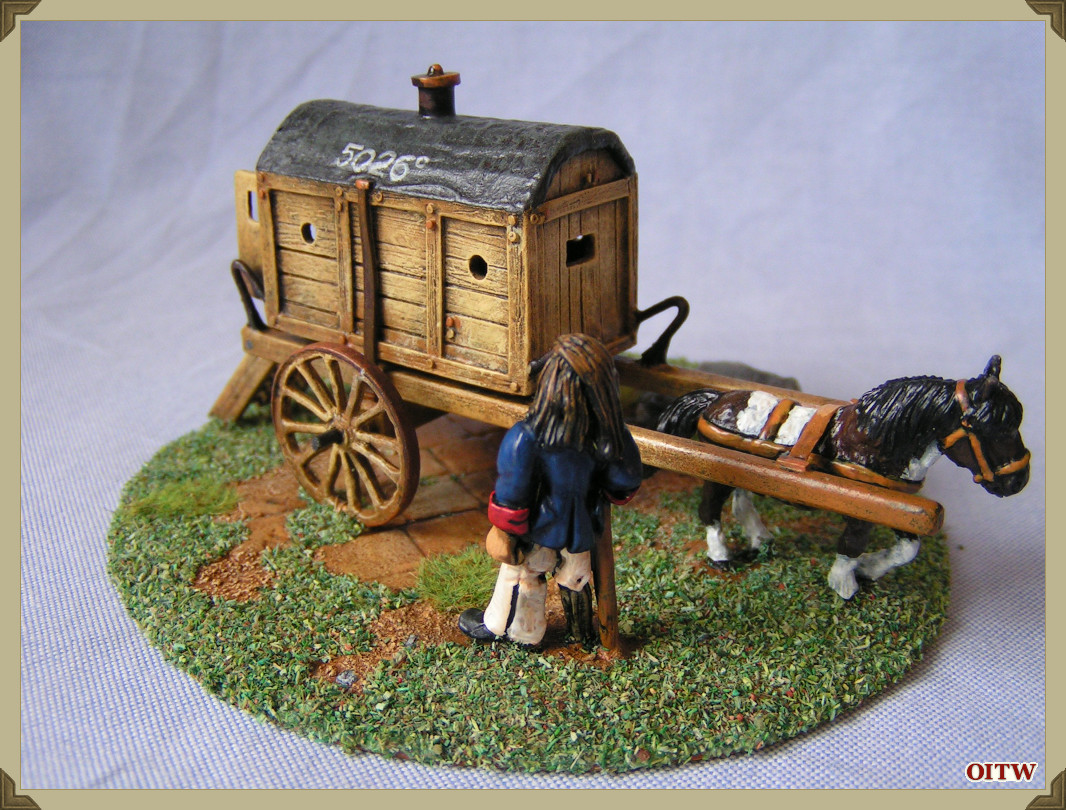
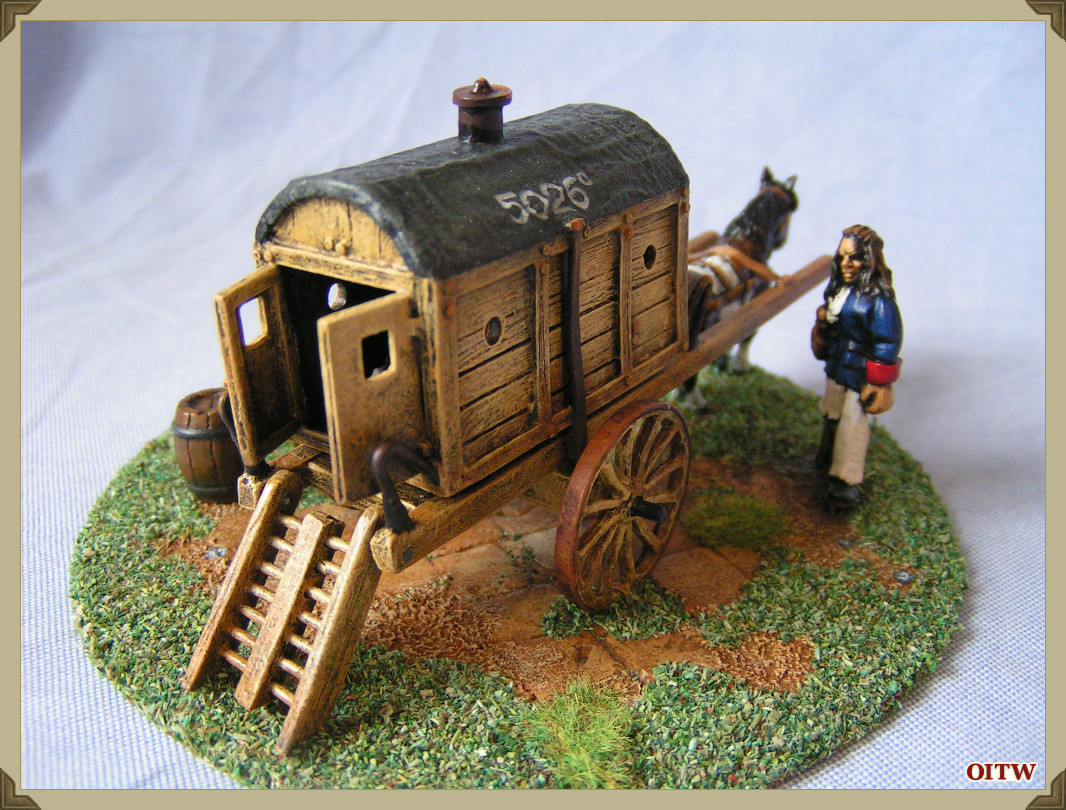
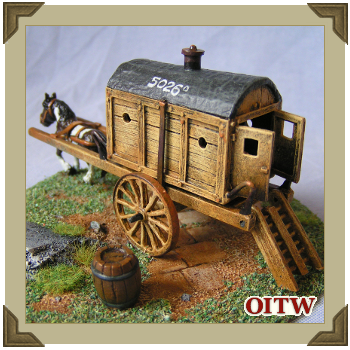
The finished Model – Larry the Ambulance!
~
Webmaster's Notes
This article was originaly published on Alternative Armies' content portal, Barking Irons, and is reproduced here with permission from the author.